DIY GUIDE · TRADES & CONSTRUCTION · CHECKED OCTOBER 2026
How to insulate your loft yourself
A day for most lofts. £248–£386 in rolls and masks for a loft of about forty square metres.
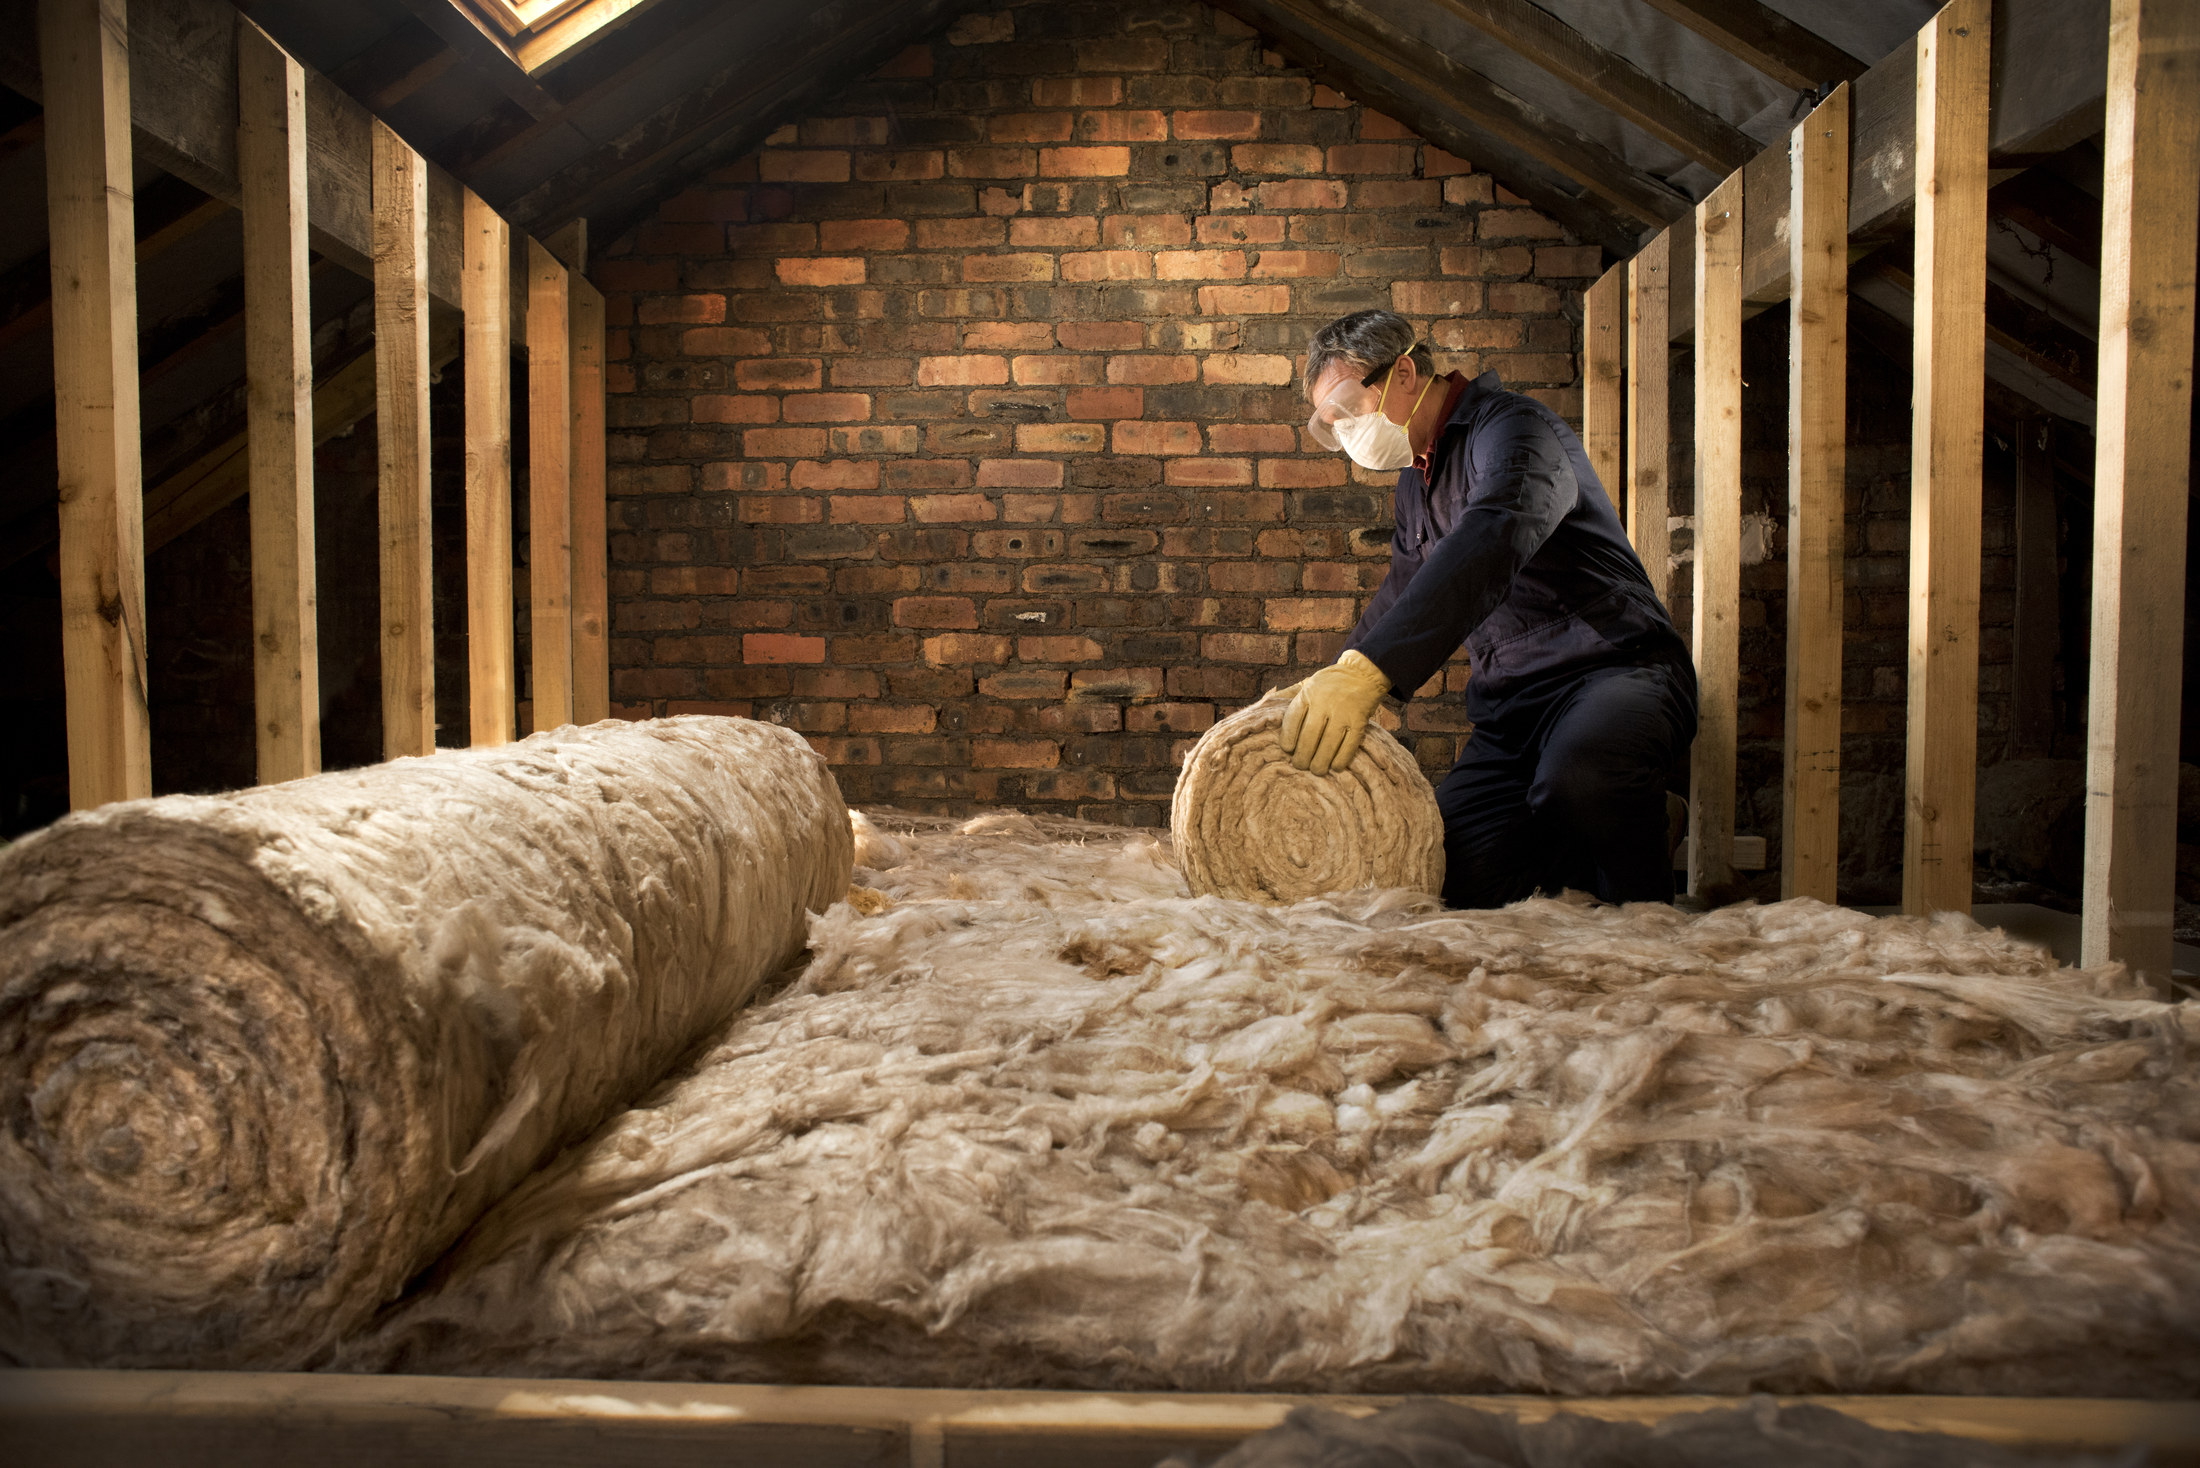
Boards to kneel on, the first layer between the joists, the next across them — and never bury a hot cable or cover a downlight.
- Every step, start to finish
- Checked October 2026 — sources at the end
- Honest about when to call a pro
FIRST, THE HONEST ANSWER
Do it yourself, or get a builder?
Do it yourself if…
- It is a cold loft with a pitched roof, insulated at ceiling level, that you only use for storage
- You can reach it safely by a fixed loft ladder or a secure ladder through the hatch
- The loft is dry, with no signs of leaks, rot or condensation on the roof timbers
- You can see the cables and lights in the loft and none needs moving or changing
Get a pro if…
- You want a grant: the schemes have their own rules about assessments and who installs, so ask before you buy
- There are recessed downlights, old cables or a junction box that would have to be moved or changed
- The loft is damp, shows mould or rot, or has signs of condensation on the underside of the roof
- You want to board the loft for storage or turn it into a room, which changes the insulation design and may need approval
Safety first
- Never step between the joists. The ceiling below is plasterboard or lath and plaster and will not take your weight; lay boards across the joists to kneel and walk on, and move them as you go.
- Treat getting into the loft as work at height. The safety regulator says ladders are fine for short, low-risk jobs if they are the right type and used properly: make sure the ladder is secure, keep three points of contact, and pass the rolls up rather than carrying them.
- Cover your skin and wear gloves, safety glasses and a dust mask. The roll maker we looked at lists gloves, an FFP1 mask as a minimum, overalls and safety glasses, plus a bump cap for the roof timbers.
- Use a torch or a battery work light, not a mains lead trailed up through the hatch, and keep clear of any cable that looks old, damaged or unsheathed.
- Never lay insulation over a recessed downlight or any light fitting that gets hot, or over a cable feeding something power-hungry like an electric shower. Covered, they overheat, and that is a fire risk.
- Work in the cooler part of the day in summer. A loft in the sun is hot, and heat with a mask on is exhausting.
Stop here: Stop here: the electrics, downlights, and anything that needs approval
Moving, extending or rewiring any circuit to make room for insulation is electrical work. In England, notifiable electrical work in homes is controlled under Part P of the Building Regulations, with guidance in Approved Document P, and must be done or certified by a registered electrician or approved through building control; Wales has its own building regulations with a matching requirement, Scotland controls building work through building standards and building warrants, and Northern Ireland through council building control. Recessed downlights and heavy-load cables covered by insulation are a fire risk. Turning the loft into a room, insulating at the rafters or making structural changes needs building regulations approval in England, a building warrant in Scotland, and the equivalent approval in Wales and Northern Ireland. Laying rolls on the loft floor is the householder's part; the rest is not. How to hire a loft insulation installer →
| MATERIAL | COVERAGE | FOR THIS JOB |
|---|---|---|
| 100 mm loft roll, for the first layer | Area on the roll label | 40 m² loft: three rolls |
| 200 mm loft roll, for the cross-layer | Area on the roll label | 40 m² loft: six rolls |
| Downlight covers | One per recessed light | As many as you have |
| Tank jacket and pipe lagging | To fit your tank and pipe runs | One jacket, a few lengths |
| Loft legs or a raised platform | Only where you need storage | One pack per small storage area |
How many rolls
Loft floor area ÷ the area on one roll, for each layer, rounded up. A 40 m² loft with 100 mm rolls of 12.18 × 1.14 m (13.9 m²) needs three rolls for the first layer; with 200 mm rolls of 6 × 1.14 m (6.84 m²) it needs six rolls for the cross-layer.
Add a little length at the eaves for each run. If a layer is already between the joists, you only need the cross-layer.
The insulation maker we looked at gives 270 mm as the building regulations minimum, 350 mm in Scotland, and says new homes typically reach 400–500 mm. The usual build-up is a first layer of 100 mm that fills the joist depth, with 170 mm or 200 mm across the top. If you already have a layer between the joists, you only need the top-up.
Glass mineral wool rolls are the light, cheap, common choice. Stone wool rolls are a little denser and very slightly better for sound. Both are non-combustible. The difference matters far less than laying either of them without gaps.
Measure the gap between your joists before buying. Combi-cut rolls are part-perforated so they can be split to fit the common spacings; the maker we looked at perforates its rolls at 2 × 600 mm and 3 × 400 mm. For odd spacings, cut the roll to width with a saw while it is still in its packaging.
If you need to store things up there, do not lay boards straight onto the joists over squashed insulation. Squashed insulation loses much of its performance, and the maker we looked at says loft boards should be raised at least 50 mm above the insulation. Use loft legs or a raised platform made for the purpose.
Buy what the details need before you start: non-combustible covers for any recessed downlights, a jacket for the cold water tank if it does not have one, and lagging for every pipe in the loft. These are what stop a well-insulated loft becoming a fire risk or a burst pipe.
Installed insulation is zero-rated for VAT until 31 March 2027, but insulation you buy from a shop to lay yourself is charged at the standard rate. In Scotland the Home Energy Scotland grant can pay up to £7,500 towards energy efficiency improvements such as insulation, if they are recommended for your home; in Wales, Nest offers free improvements to eligible lower-income households. Check before you buy anything, because a grant covers work done through the scheme, not materials you have already laid.
THE PART THAT DECIDES THE FINISH
Preparing the loft — by what you find up there
Every loft is different, and the hour you spend looking before you lay anything decides whether the job is safe. Find what you have below and do its list first.
A bare loft with open joists
The full job: two layers.
- Clear everything stored in the loft and lay crawl boards across the joists as a working platform
- Measure the floor area and the spacing between the joists
- Check the depth of the joists; the first layer should fill them
- Seal gaps where pipes and cables come up through the ceiling with a flexible sealant, so warm damp air does not rise into the loft
An old, thin layer already down
The common case: top it up.
- Check the old layer is dry and not compressed or patchy; replace any wet or soiled pieces
- Make sure the old layer fills the joists evenly; fill gaps before adding the cross-layer
- Lift any cables lying under it free if you can do so without pulling them
- Plan only the top layer, laid at right angles to the joists
Cables, lights and junction boxes
The part that sets the limit of this job.
- Find every recessed downlight from below and mark it in the loft; fit a non-combustible downlight cover over each one, or stop and get an electrician
- Lay cables on top of the new insulation, not under it, especially heavy-load cables such as an electric shower's
- Do not move, join or extend any cable or touch a junction box — that is electrical work
- If the cables look old, brittle or are not in a plastic sheath, stop and have them checked first
Water tank and pipes
Keep the warmth where it protects them.
- Leave the area directly under the cold water tank uninsulated, so heat rising from the house keeps it from freezing
- Fit a tight jacket to the tank and lap the floor insulation up to meet it
- Lag every water pipe in the loft, including the overflow
- Leave a clear, boarded path to the tank and any valves for future access
The eaves and roof ventilation
Do not block the air path.
- Find the ventilation openings at the eaves, under the roof edge
- Keep the insulation back from the roof so air can flow over it; the maker we looked at keeps a 50 mm air gap there
- Fit eaves ventilators or trays if the gap is hard to keep open
- Check bathroom and kitchen extractor fans duct to the outside, not into the loft
THE JOB
How to insulate a loft
Get in safely and set up a platform
45 minMake sure the loft ladder is secure, or set a ladder at the hatch so it cannot slip, and pass everything up rather than carrying it. Clear stored items out of the way. Lay crawl boards across the joists to form a working platform and a path, and set up your battery light. Then go to the preparation section above and work through what you find.
- Two people: one in the loft, one passing rolls up
- Boards across at least two joists, always
- Wear the bump cap from the first minute
Mistake to avoid: Stepping between the joists, just once, to reach something. The foot goes straight through the ceiling below, and you may follow it.
Survey the cables, lights, tank and eaves
45 minBefore anything is laid, find every cable, recessed light, junction box, pipe, tank and vent, and mark them. Fit non-combustible covers over downlights. Lift cables that lie loose on the ceiling so they will sit on top of the new insulation, without pulling or stretching them. If any cable looks old, damaged or unsheathed, stop here and get it checked.
- Count the downlights from below and find each one from above
- Leave junction boxes visible and reachable
- Never cut or join a cable to make it fit
Mistake to avoid: Rolling insulation straight over everything. A buried downlight or heavy-load cable overheats, and a buried junction box is lost forever.
Seal the gaps in the ceiling
30 minSeal around pipes, cables and wall tops where they come up through the ceiling with a flexible sealant or tape. This stops warm, damp air from the house rising into the cold loft, which is where condensation comes from once the loft is well insulated.
- Look for gaps around soil pipes, light cables and the hatch
- Use a flexible sealant that will cope with small movement
- Do not seal ventilation openings at the eaves
Mistake to avoid: Insulating over the gaps. The insulation stops the heat but not the damp air, and the cold loft above it gets condensation on the timbers.
Cut the rolls to the joist spacing
20 minWith the roll still in its packaging, cut it to the width that fits snugly between your joists, using the perforations on a combi-cut roll or a saw for odd spacings. The maker we looked at says cutting should be done while the roll is still wrapped. Open the pack only once it is in the loft.
- Measure between the joists in several places; spacing varies
- Cut a fraction wide for a snug fit, not tight
- Open the pack away from your face; it springs open
Mistake to avoid: Opening the pack on the landing. The roll expands to many times its packed size and will not go back through the hatch.
Lay the first layer between the joists
1–2 hoursStart at the eaves, furthest from the hatch. Ease each piece into the space between joists so it fills the full depth without being squashed, fluffing it up as it unrolls. Butt the ends of each piece tightly, and work back towards the hatch. Leave the area under the water tank clear.
- Fill the joist depth fully and evenly; no gaps at the ends
- Short pieces are easier to tuck into the eaves
- Cut neatly around obstacles rather than squashing insulation against them
Mistake to avoid: Leaving gaps at the ends of runs or around obstacles. Heat finds every gap, and a patchy layer is worth much less than its depth suggests.
Keep the eaves ventilated
30 minAt each eaves, push the insulation into the corner far enough to meet the wall head, but keep it clear of the roof so air can still move over it from the vents. The maker we looked at keeps a 50 mm air gap and suggests a thinner product where space is tight. Fit eaves trays or ventilators if the insulation keeps blocking the gap.
- Look along the eaves with the torch; you should see daylight or vents
- Use a broom handle to ease insulation into hard-to-reach eaves
- Never stuff insulation into the eaves vent itself
Mistake to avoid: Packing the eaves tight to the roof. It blocks the ventilation and condensation forms on the cold side of the roof.
Lay the cross-layer over the joists
2–3 hoursRoll the thicker layer out at right angles to the joists, covering the first layer and the tops of the joists. Butt the edges of each run tightly together. Start at the eaves and work towards the hatch, so you are never kneeling on finished insulation without a board.
- Right angles to the first layer, always
- Butt edges together; no gaps between runs
- Lay cables on top of this layer, never under it
Mistake to avoid: Laying the second layer the same way as the first. The joist tops stay uncovered, and every joist is a strip of heat loss across the ceiling.
Insulate around the tank and pipes
30 minFit the tank jacket, lapping the floor insulation up to meet it at the sides but leaving the floor directly beneath the tank uninsulated. Lag every pipe in the loft, including the overflow, and make sure no pipe is left exposed outside the insulation.
- Leave the area under the tank open to the warmth below
- Tape the joins in pipe lagging
- Leave access to valves clear
Mistake to avoid: Insulating under the tank. The house's warmth can no longer reach it, and the tank and pipes freeze in a cold spell.
Insulate and draught-strip the hatch
30 minCut a piece of roll to fit the top of the hatch door, wrap it in heavy-duty polythene so the fibres stay put, and fix it to the hatch. Fit draught strip around the hatch frame. The stone wool maker we looked at recommends at least 100 mm on the hatch.
- Wrap the insulation so it does not shed fibres onto the landing
- Fit a catch or bolt so the hatch closes firmly onto its draught strip
- Check the hatch still opens and closes easily
Mistake to avoid: Leaving the hatch bare. A well-insulated loft with an uninsulated hatch has a large cold patch right where warm air escapes.
Make a walkway and tidy up
30 minLeave a clear boarded path from the hatch to the tank, any valves and anything that needs servicing, raised on loft legs if needed so the insulation under it is not squashed. Gather offcuts and packaging, vacuum the landing, and wash your work clothes separately.
- Raise any boards at least 50 mm above the insulation
- Bag the offcuts in the loft before carrying them down
- Wash clothes separately to avoid fibres in other washing
Mistake to avoid: Nailing boards straight onto the joists over the new insulation. It squashes the layer, cutting its performance where you have just paid for it.
The mistakes that show
- Covering a downlight or a heavy-load cable, which can overheat
- Laying both layers the same direction so the joist tops stay exposed
- Blocking the eaves so the loft cannot ventilate
- Insulating under the water tank, so it freezes
- Squashing the insulation under boards laid straight on the joists
Stop here and get a loft insulation installer
- Any cable, junction box or light fitting would have to be moved, joined or changed to fit the insulation
- There are recessed downlights you cannot cover safely, or the wiring looks old or damaged
- The loft shows damp, mould or rot, or the roof needs repair
- You want to insulate between the rafters, board the loft for a room, or convert it — that is a different design and may need approval
- You want a grant — apply through the scheme before any work starts
| WHAT YOU SEE | WHY, AND THE FIX |
|---|---|
| Condensation or mould on the roof timbers | Warm damp air is getting in through gaps in the ceiling, or the eaves are blocked. Seal the ceiling gaps, clear the eaves so air can move, and check extractor fans vent outside. If it persists, get the roof ventilation checked. |
| The pipes or tank froze after insulating | The insulation was laid under the tank, or pipes were left exposed above the insulation. Clear the floor under the tank, jacket it and lag every pipe. |
| The house still feels cold upstairs | Gaps between rolls, joists left uncovered, an uninsulated hatch or a draughty hatch frame. Check the layer is continuous, cross-lay the top layer, and insulate and draught-strip the hatch. |
| Itchy skin after the job | Mineral wool fibres irritate skin temporarily. Rinse in cold water before washing, as the stone wool maker advises, and wear long sleeves and gloves next time. |
| A light fitting or cable feels warm under the insulation | It has been covered. Pull the insulation back at once, fit a proper downlight cover or lay the cable on top, and have an electrician check it if it was hot. |
| The insulation is flattened in places | It has been walked on or boarded over. Fluff it up or replace the squashed pieces, and raise any storage boards on loft legs. |
| Damp patches on the ceiling below | A roof leak now hidden by the insulation, or condensation dripping from cold timbers. Lift the insulation in that area, find the cause and fix it before re-laying. |
WHAT YOU SAVE
What it costs to do it yourself
| 200 mm loft roll for the cross-layer, six rolls | £245.94 |
|---|---|
| 100 mm loft roll for the first layer, three rolls, if the joists are bare | £0–£115.47 |
| Dust masks | £1.99–£3.98 |
| Loft legs for a storage area, if needed | £0–£20.99 |
| Total | £248–£386 |
| DIY total | £248–£386 |
Guide prices compiled by the Locufy team from published Irish and UK provider price lists and 2026/27 cost guides. Updated 2026.
Worked for a loft of about forty square metres at a national trade retailer's prices, which include standard-rate VAT. Installed insulation is zero-rated for VAT until 31 March 2027, so compare a fitted quote properly; the installer's price from the price guide is shown alongside.
RATHER NOT?
Loft insulation installers near you, with prices shown
The ones who cover your area, nearest first, with one score from every review. No account needed to look.
Or post the job free and let them come to you.
Check the eaves are still clear and look for condensation on the roof timbers after the first cold weeks. Damp timbers mean the ceiling needs sealing or the ventilation needs improving.
Bag mineral wool offcuts and put them in general waste or take them to your council's household waste and recycling centre as general household waste; the polythene packaging can go in the site's plastics container where it accepts film. Check your council's page for DIY-waste limits.
Leave the boarded walkway to the tank and valves clear, and do not pile stored things onto the insulation.
Vacuum the landing under the hatch, wash work clothes separately, and rinse any itchy skin in cold water before washing.
Insulating a loft: questions people ask
The insulation maker we looked at gives 270 mm as the building regulations minimum, or 350 mm in Scotland, usually as 100 mm between the joists and 170 mm or more across them. New homes typically go further, to 400–500 mm.
Ordinary lighting cables can usually sit on top of the insulation, which is where they should be laid. Heavy-load cables, such as an electric shower's, must not be covered, and any cable that would need moving or joining is a job for an electrician.
Not directly. Recessed downlights get hot, and the maker we looked at says they must be kept apart from the insulation with non-combustible downlight covers. If you cannot fit covers safely, get an electrician.
No. Leave the area directly under the tank uninsulated so warmth from the house keeps it from freezing, fit a jacket to the tank and lag the pipes.
In Scotland the Home Energy Scotland grant can cover up to £7,500 of energy efficiency improvements, such as insulation, recommended for your home. In Wales, Nest provides free improvements to eligible lower-income households with a low EPC rating. Ask the scheme before you buy anything or start work.
The Locufy UK price guide puts professional loft insulation at £300–£1,500 per job, typically £950 — the same three figures as the strip at the top of this page.
MORE GUIDES
More DIY guides
Sources — checked October 2026
- HSE — safe use of ladders and stepladders
- Knauf Insulation — loft roll installation guide: 270 mm minimum, 350 mm in Scotland, 400–500 mm new build; 100 mm between and 170 mm over; FFP1 mask minimum; perforated at 2 × 600 and 3 × 400 mm; 50 mm air gap; downlight covers; tank; boards raised 50 mm
- ROCKWOOL — roll installation guide: hatch at least 100 mm, cables lifted free, not under cold water tanks, rinse skin in cold water
- gov.uk — Approved Document P: electrical safety in dwellings (England)
- gov.uk — building regulations approval: work covered (England)
- mygov.scot — if a builder is doing the work: building warrants in Scotland
- nidirect — how to apply for Building Regulations approval (Northern Ireland)
- gov.uk — VAT on energy-saving materials (Notice 708/6): installation zero-rated to 31 March 2027, retail sales standard-rated
- mygov.scot — Home Energy Scotland grant and loan: up to £7,500 for energy efficiency such as insulation
- gov.wales — free home energy efficiency improvements from Nest: eligibility
- North Northamptonshire Council — what can be recycled at household waste recycling centres (general household waste, plastics)
- Toolstation — loft insulation price check: 100 mm roll £38.49, 200 mm roll £40.99, loft legs £20.99
- Toolstation — 100 mm loft roll product page: 12.18 m × 1140 mm
- Toolstation — 200 mm loft roll product page: 6 m × 1140 mm
- Toolstation — face masks price check: FFP1 £1.99, FFP2 £3.98