DIY GUIDE · VEHICLES & TRANSPORT · CHECKED OCTOBER 2026
How to detail a car yourself
A full day, or a weekend. €94–€132 in products by hand, more with a machine polisher.
Wash, decontaminate, clay, polish, protect — and test every product on a small patch first.
- Every step, start to finish
- Checked October 2026 — sources at the end
- Honest about when to call a pro
FIRST, THE HONEST ANSWER
Do it yourself, or get a garage?
Do it yourself if…
- The paint is factory paint in sound condition, with light swirls, dullness and bonded grime rather than deep scratches
- You have a shaded or covered space where the car can stay dry and cool for a full day
- You are patient enough to work a panel at a time and test each product on a hidden area first
- You already wash the car with two buckets and know how to dry it without marking it
- You are happy to polish by hand, or to learn a dual-action machine on a scrap panel or a low edge first
Get a pro if…
- The paint has deep scratches that catch a fingernail, chips to bare metal or flaking clear coat
- The car is a matt finish, a wrap or a respray of unknown quality; polishing can ruin all three
- You want heavy paint correction with a rotary machine and compounds
- The interior has mould, a deep spill in the seat foam or nicotine staining in the headlining
- The car is a classic or high-value car where a mistake would cost more than the job
Safety first
- Read every label, and the safety data sheet where the label points to one. The safety regulator's advice to people working with vehicle chemicals is to read hazard labels and data sheets and protect skin and eyes.
- Wear nitrile gloves for tar and fallout removers and compounds, and eye protection when spraying. Never clean your hands with solvent or concentrated cleaner.
- Keep products in their original containers, away from children, and never mix them.
- Keep a polisher's cable behind you and away from the pad, and unplug it before changing pads.
- Ventilate the car or the garage when using solvent-based removers and interior products, and keep them away from flames and heaters.
- Do not let rinse water carrying tar removers, fallout removers or polish run into a road gully; releasing polluting matter to drains counts as water pollution.
| MATERIAL | COVERAGE | FOR THIS JOB |
|---|---|---|
| Tar remover | Applied to the spots only, with the contact time on the label | Lower panels and behind the wheels |
| Clay bar and lubricant | A piece the size of a large coin at a time | One bar for most cars |
| Polish or compound | A small amount per section | One bottle for several details |
| Wax or sealant | A thin coat; more is not better | One coat, or two with a curing gap |
| Leather cleaner and interior shampoo | Applied to a cloth or brush, never soaked in | As the seats need |
How long will polishing take?
Time ≈ number of sections × minutes per section. Divide each panel into sections about 50 cm square: a family car has roughly 40. At 6 minutes a section by hand that is 40 × 6 = 240 minutes, or four hours, before waxing.
A dual-action machine roughly halves the time on flat panels but not on edges and around badges, which you should do by hand anyway. Plan breaks; tired arms polish badly.
Washing leaves bonded dirt behind. A tar remover dissolves black tar spots on the lower panels; the one we read is wiped on and given 1-2 minutes to work. An iron fallout remover lifts brake dust embedded in the paint. A clay bar, used with a lubricant, picks up what is left. After clay, the paint should feel like glass.
A polish refines the surface and adds gloss; a compound cuts deeper to remove haze, swirls and light scratches. The finer the product, the less clear coat it removes. Start with the gentlest product that does the job, and only step up on the areas that need it. The compound we read works on a hand pad as well as on a dual-action polisher.
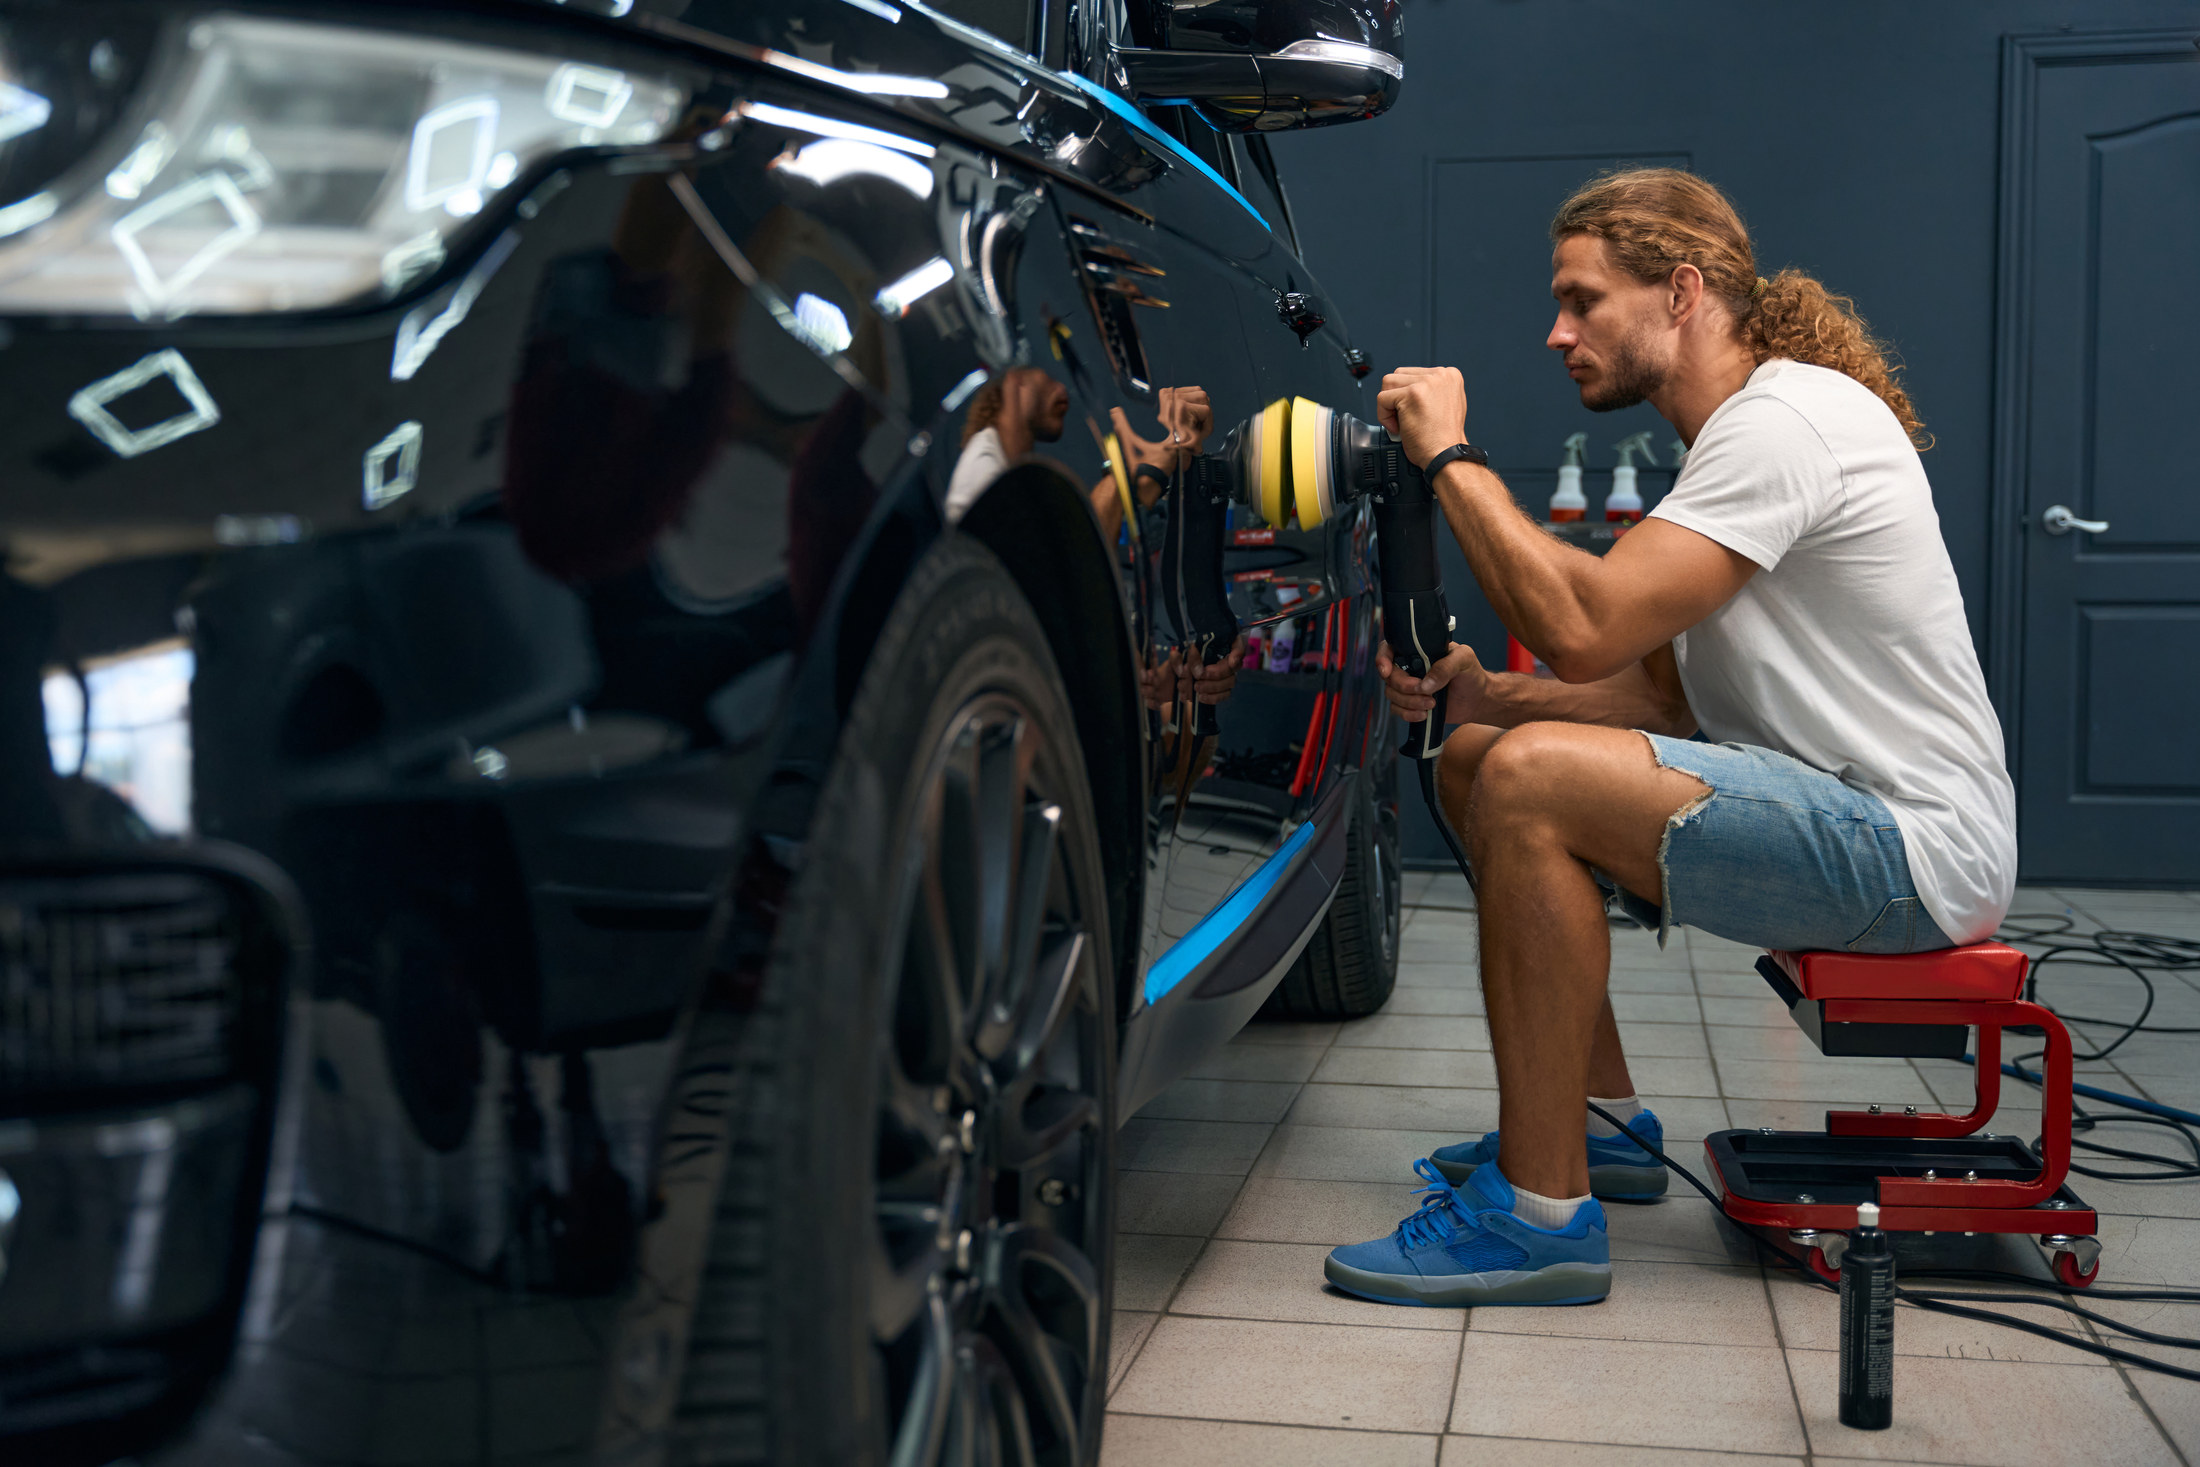
Hand polishing with an applicator pad is slow but very hard to get wrong. A dual-action polisher oscillates as it spins, which makes it far safer than a rotary, and it corrects more in less time. If you buy one, practise on a flat, low panel first and keep it away from edges, badges and creases, where the paint is thinnest.
A paste wax gives a warm gloss but lasts weeks to a few months. A synthetic sealant lasts longer. A ceramic coating lasts longer still but needs a perfect surface and its own careful method, covered in our ceramic coating guide. Whatever you choose, it seals in the finish you have just polished, so polish first.
Use a dedicated leather cleaner on leather, an interior shampoo on fabric, a plastics cleaner and dressing on trim, and plain water on a soft cloth for screens. Avoid gloss dressings on the dashboard; they reflect in the windscreen.
Matt paint, vinyl wraps, unpainted textured plastic and rubber seals must not be polished. The polish we read says plainly it is not for matt or satin paint, wraps, vinyl decals or unpainted trim. Mask these before you start.
THE PART THAT DECIDES THE FINISH
Preparing the paint — by what you start with
Before you touch the paint with polish, find out what it is and what is wrong with it. Wash and dry the car, then find your paint below.
Paint that feels rough after washing
Run your fingertips over the clean bonnet inside a thin plastic bag; if it feels gritty, it needs decontaminating.
- Treat tar spots on the lower panels with tar remover on a cloth, giving it the contact time on the label
- Spray an iron fallout remover on the lower panels and rear, let it work out of the sun, then rinse well
- Clay every painted panel with plenty of lubricant
- Rinse and dry again before polishing
Dark paint with swirl marks
Fine circular scratches that show under a torch or in sunlight.
- Inspect each panel with a strong torch held at an angle
- Mark the worst areas with low-tack tape outside the area so you can find them again
- Test your polish on a hidden section such as the lower door first
- Plan on a compound for the worst areas and a finer polish everywhere
Older, dull or faded paint
Paint that looks flat or chalky, often on red or older cars.
- Check for clear coat first: polish a small hidden patch and look at the pad; colour on the pad means single-stage paint with no clear coat
- Use only a fine polish on single-stage paint and work gently
- Check for flaking or peeling clear coat; polishing will make it worse
- Expect more than one pass on the worst panels
Matt paint, wraps and textured trim
Anything that should not shine.
- Do not polish, clay hard or wax a matt finish or a wrap
- Use products made for matt finishes only
- Mask textured plastic trim and rubber seals before polishing other panels
- Clean badges and grilles with a soft brush, not a pad
An interior that needs a deep clean
Grime in seams, stained fabric and tired leather.
- Remove the mats and everything loose
- Vacuum with a brush tool, working dust out of seams and vents first
- Test every cleaner on a hidden patch
- Plan to dry the interior with the doors open on a dry day
THE JOB
How to detail a car
Set up in the shade and wash the car
1 hourPark in a shaded or covered space where the car can stay cool and dry all day. Clean the wheels first, pre-rinse, foam the lower half if it is dirty, then wash with two buckets from the roof down and dry thoroughly. The shampoo we read is mixed at 2 capfuls per 10 litres and must not dry on the paint. Then go to the section above and check your paint.
- Use a pH-neutral shampoo so you do not strip anything you want to keep
- Dry door shuts and mirrors so water does not run onto polished paint
- Have all your products and cloths laid out before you start
Mistake to avoid: Detailing in direct sun. Polish and wax dry too quickly on a warm panel and leave a haze that is hard to remove.
Remove tar and iron fallout
45 minutesWork on the lower panels and behind the wheels. Apply tar remover to a clean cotton cloth and hold it on each tar spot; the remover we read asks for 1-2 minutes of contact before you wipe. Then apply an iron fallout remover as its label says, out of the sun, and rinse thoroughly before it dries. Wear gloves and eye protection for both.
- Wipe dissolved tar off gently; scrubbing drags it across the paint
- Keep these products off hot brakes and rubber seals
- Rinse the ground below the car onto grass or gravel, not a gully
Mistake to avoid: Picking tar spots off with a fingernail. It scratches the paint every time.
Clay the paint
1 hourKnead a piece of clay the size of a large coin and flatten it. Spray plenty of lubricant onto a small area and onto the clay, then glide the clay over the paint in straight lines with no pressure. When it moves freely and the area feels smooth, wipe off the lubricant and move on with a slight overlap. Fold and knead the clay often to expose a clean face.
- Keep everything wet; dry clay drags and marks the paint
- Throw away any piece you drop on the ground
- Feel each panel with your fingertips before and after
Mistake to avoid: Using the clay until it is grey all over. Once it will not fold to a clean surface, it is time for a new piece.
Mask and inspect
30 minutesRinse and dry the car again. Cover rubber seals, textured trim, badges and plastic edges with low-tack masking tape. Go round each panel with a strong torch held at an angle and note the swirls and marks. Divide the panels into sections about half a metre square in your head.
- Mask round the edges of panels with tape so you know where to slow down
- Use the torch at different angles; swirls show at one angle only
- Note any deep scratch that catches a fingernail; polishing will only soften it
Mistake to avoid: Polishing over rubber and black trim. Polish dries white in the texture and is very hard to get out.
Test polish on a hidden section
20 minutesChoose a low, flat, hidden area such as the lower part of a rear door. Apply a few small drops of your gentlest polish to an applicator pad, or a primed machine pad, and work one small section. Wipe it off and look under the torch. If the swirls are still there, try a little more pressure or the next product up on the next section, until you find the gentlest combination that works.
- Write down what worked so you use it on every panel
- Stop at the first combination that gives a good result
- Check the pad; colour on it means single-stage paint
Mistake to avoid: Starting with the strongest compound everywhere. It removes more clear coat than the job needs, and clear coat does not grow back.
Polish the car section by section
3 hoursBy hand, work each section with the pad in overlapping passes, firm on the marks, lighter as the polish breaks down. With a dual-action polisher, spread the polish at low speed, then work at a medium speed in slow, overlapping passes across and then along the section, keeping the pad flat. The compound we read is worked with more pressure on the marks and less as it turns oily, for gloss. Wipe off each section with a clean microfibre before moving on.
- Keep the machine pad flat; tilting it concentrates heat on one edge
- Stay off edges, creases and badges with the machine; do them by hand
- Clean or change the pad when it clogs
Mistake to avoid: Holding the machine on a body line or an edge. The paint there is thinnest, and you can burn through to the colour coat in seconds.
Remove residue and check
30 minutesWhen every panel is done, wipe the car down with a clean microfibre and a panel wipe or quick detailer to remove polish oils, so the protection bonds. Check every panel under the torch again. Touch up any area that still shows swirls before you protect it, because protection seals in whatever is there.
- Use fresh cloths; old ones carry polish back onto the paint
- Look along the panels from a low angle for haze
- Take off the masking tape slowly
Mistake to avoid: Waxing over polish residue. The wax does not bond, and the finish looks smeary and fades within weeks.
Apply wax or sealant
45 minutesApply a thin, even coat of wax or sealant with a clean foam applicator, one panel at a time, following its label for the drying time. Buff it off with a clean, soft microfibre, turning the cloth often. If the label allows a second coat, wait the time it gives before applying it.
- Thin coats buff off easily; thick ones smear
- Keep wax off black trim and rubber
- Do the glass separately with glass cleaner
Mistake to avoid: Applying wax in the sun or on a warm panel. It flashes too fast and leaves high spots.
Deep clean the interior
2 hoursWork from the top down. Vacuum, then clean hard surfaces with interior cleaner on a cloth and a soft brush into the seams and vents. Shampoo fabric seats and carpet lightly, a whole panel at a time, and lift the dirt with a damp cloth. Clean leather with a leather cleaner applied to a cloth, then wipe it dry straight away. Finish with the inside glass.
- Keep fabric damp, never soaked
- Wipe screens with a barely damp clean cloth only
- Use a matt dressing on the dashboard so it does not reflect in the screen
Mistake to avoid: Soaking seats and carpet. Water that reaches the foam takes days to dry and smells of damp.
Final details and tidy up
30 minutesDress the tyres with a thin coat on the sidewall only, clean the exhaust tips, polish the glass inside and out once more and do a last walk round in daylight. Empty the buckets onto grass or gravel, and wash all the cloths and pads.
- Look at the car from a few metres away in daylight; it shows uneven gloss
- Leave the doors open for an hour if the interior is still damp
- Note the date and products used, so the next detail starts from what worked
Mistake to avoid: Driving off in the rain straight away. Fresh wax or sealant needs time to cure before it is properly water-resistant.
The mistakes that show
- Working in direct sun so products dry before you can work them
- Using the strongest compound everywhere instead of the gentlest that works
- Running a machine polisher over edges and body lines
- Claying dry, or with a piece that has been dropped
- Polish dried white into black trim
- Waxing over polish oils so the protection never bonds
Stop here and get a car detailer
- Scratches catch a fingernail, or the clear coat is flaking
- The car is matt, wrapped or has a respray you know nothing about
- You have burned through on an edge and colour is showing
- The interior has mould or a spill soaked into the seat foam
| WHAT YOU SEE | WHY, AND THE FIX |
|---|---|
| Hazy or greasy-looking paint after waxing | Wax applied too thickly, or over polish residue. Buff again with a clean, dry microfibre; if it stays, wipe the panel down with a panel wipe and reapply a thin coat. |
| White residue in textured trim | Polish or wax dried in the grain. Work it out with a soft brush and a little all-purpose cleaner, then rinse. Mask the trim next time. |
| Swirls still showing after polishing | The product was too fine for the defect, or it was not worked long enough. Re-test on one section with more passes or the next product up, then finish with the fine polish. |
| A light patch where colour shows through on an edge | The polisher burned through the clear coat. Stop polishing that area. It needs a paint repair, which is in our scratch repair guide, or a body shop. |
| New fine scratches after claying | The clay was dirty, dropped or used without enough lubricant. Polish the area lightly, and use a fresh piece of clay with plenty of lubricant next time. |
| Paint still feels rough after clay | Heavy fallout or overspray. Use an iron fallout remover first, then clay again with a fresh piece. |
| Tide marks on the seats after shampooing | Only part of a panel was cleaned. Clean the whole panel evenly with a damp cloth and let it dry with the doors open. |
| Water stops beading within weeks | The protection did not bond, usually because of polish oils or a contaminated surface, or the car is washed with a harsh shampoo. Strip, clean and reapply, then wash with a pH-neutral shampoo. |
WHAT YOU SAVE
What it costs to do it yourself
| Snow foam | €9.60–€19.20 |
|---|---|
| Tar remover | €11.99 |
| Clay kit | €29.99–€41.99 |
| Polish | €16.55 |
| Wax | €16.19–€32.39 |
| Leather cleaner | €9.95 |
| Total, by hand | €94–€132 |
| Optional: dual-action polisher and foam pads | €181.78 |
| DIY total | €94–€132 |
Guide prices compiled by the Locufy team from published Irish and UK provider price lists and 2026/27 cost guides. Updated 2026.
Prices from an Irish motor retailer's car-cleaning and polishing ranges for October 2026; most products do several details. The professional detailing price, from the price guide, is shown alongside.
RATHER NOT?
Car detailers near you, with prices shown
The ones who cover your area, nearest first, with one score from every review. No account needed to look.
Or post the job free and let them come to you.
Keep the car out of the rain for as long as the wax or sealant label asks, and do not wash it for a few days.
Empty, rinsed plastic bottles go in the recycling. Part-used tar and fallout removers, solvent cleaners and aerosols are household hazardous waste; take them to a civic amenity site that accepts them, using the locator on mywaste.ie. Never pour them down a drain.
Wash microfibre and foam pads in warm water with a little detergent, without fabric softener, and air-dry them. Throw away clay that has been dropped.
Wash every couple of weeks with a pH-neutral shampoo and two buckets, and top up with a spray sealant. A full detail once or twice a year is plenty for most cars.
Detailing a car: questions people ask
A valet is a thorough clean inside and out. Detailing adds decontamination, polishing to improve the paint and a protective layer, with a much slower interior clean.
If the clean paint feels rough through a thin plastic bag, yes. Clay lifts bonded contamination that washing cannot, and polish and wax work better on a smooth surface.
Yes. It is slower than a machine but very hard to damage paint with. A dual-action polisher is quicker and still forgiving if you keep it flat and away from edges.
It removes swirls and light marks. A scratch that catches a fingernail is through the clear coat, and polishing only softens its edges.
Once or twice a year for most cars, with safe washing and a spray sealant in between.
The Locufy price guide for Ireland puts car detailing at €100–€600 per detail, with €250 typical, depending on how much correction and interior work is included.
MORE GUIDES
More DIY guides
Sources — checked October 2026
- Autoglym — Clay Detailing Complete Kit: wash and dry, knead a coin-sized piece, keep the car cool, plenty of lubricant, straight lines, fold the clay often
- Autoglym — Intensive Tar Remover: applied on a cotton cloth, 1-2 minutes contact time, then wipe or wash off
- Autoglym — Super Resin Polish: thin layer in overlapping circles, more pressure on marks, buff when dry; not for matt or satin paint, wraps, vinyl decals or unpainted trim
- Autoglym — Advanced Paint Restorer: by hand or on a dual-action machine pad; more pressure on marks, less as it breaks down; clean, contaminant-free, dry surface
- Autoglym — Bodywork Shampoo Conditioner: 2 capfuls to 10 litres; cool surface; do not let it dry
- HSA — Motor Vehicle Repair: Hazardous Chemicals (read hazard labels and safety data sheets; protect skin and eyes; never clean hands with solvents)
- HSA — Use Chemicals Safely at Home and in the Garden (car cleaning products; original containers; do not mix)
- MyWaste — chemicals: household hazardous waste to civic amenity sites
- MyWaste — aerosols: hazardous waste to the civic amenity site
- Limerick City and County Council — water pollution: polluting matter released to drains, including via hard surfaces
- Halfords Ireland — car shampoo and pre-wash price check, October 2026: snow foam €9.60–€19.20, tar remover €11.99
- Halfords Ireland — clay bars price check, October 2026: clay kits €29.99–€41.99
- Halfords Ireland — car polish price check, October 2026: €16.55
- Halfords Ireland — car wax price check, October 2026: €16.19–€32.39
- Halfords Ireland — polishers and accessories price check, October 2026: dual-action polisher €161.99, foam pads €19.79
- Halfords Ireland — interior cleaning price check, October 2026: leather cleaner €9.95