DIY GUIDE · HOME REPAIRS & HANDYMAN · CHECKED OCTOBER 2026
How to paint a room yourself
A weekend job, done properly.
The order of work, the quantities from the makers' own figures, and the mistakes that cause nearly every bad finish.
- Every step, start to finish
- Checked October 2026 — sources at the end
- Honest about when to call a pro
FIRST, THE HONEST ANSWER
Do it yourself, or get a painter?
Do it yourself if…
- Walls are sound — no damp, no crumbling plaster, no mould that keeps coming back
- You can reach everything from a step-ladder; ceilings up to about 2.7 m
- You have a free weekend and somewhere to put the furniture
Get a pro if…
- Stairwells, double-height halls or anything that needs a scaffold tower
- Damp, blown plaster or wallpaper that will not come off — the painting is the easy part of those jobs
- A house built before 1980 with old, flaking paint you plan to sand: old paint can contain lead; a pro tests it first
Safety first
- Work from a step-ladder on a level floor, never from a chair or the stairs — falls from height are the most common DIY injury
- Open the windows: water-based emulsion is low-odour, but solvent-based gloss needs ventilation
- Do not dry-sand old paint in a pre-1980 house without a lead test — a test kit costs a few euro
- Keep paint, white spirit and rags away from children and pets; rags soaked in solvent can self-heat in a bin
| MATERIAL | COVERAGE | FOR THIS ROOM |
|---|---|---|
| Matt or silk emulsion for walls | 1 L covers about 14 m² per coat — two coats | 4 × 4 m room, 2.5 m ceilings: ~40 m² of wall → 6–7 L for two coats |
| Ceiling emulsion (flat matt white) | Same coverage | 16 m² ceiling → 2.5 L for two coats |
| Primer or mist coat | Only on bare or filled plaster | Emulsion thinned about 20% with water |
| Ready-mixed filler | A small tub does a room | Deep cracks: two thin fills, not one thick one |
| Gloss or satin for woodwork | Optional; a 750 ml tin does skirting and a door | Water-based dries in hours and does not yellow |
How much paint
Paint you need: 5.1 L
Buy 5.5 L — one 5 L tin and one 1 L, or two 2.5 L and one 1 L
Coverage varies by brand and surface; the tin states its own figure — use it.
| WHERE | FINISH | TYPE | WHY |
|---|---|---|---|
| Walls — living rooms, bedrooms | Matt | Water-based emulsion | Hides bumps and roller marks; the modern default |
| Walls — kitchen, bathroom, hall | Soft sheen or silk, or a kitchen/bathroom matt | Water-based emulsion, mould-resistant where damp | Wipeable; shows imperfections, so prep harder |
| Ceilings | Flat matt, white | Ceiling emulsion | Flattest finish hides the joints and the roller |
| Skirting, doors, frames | Satin (or gloss) | Water-based satin or gloss | Hard-wearing; satin forgives, gloss shows all |
| Bare plaster or filler | — | Mist coat (emulsion thinned ~20%) | Seals the surface so the top coat does not flash or peel |
| Stains, nicotine, water marks | — | Stain-block primer (shellac or oil-based) | Emulsion alone never covers them |
| Bare wood or MDF | — | Knotting, wood primer, undercoat | Knots bleed through white paint without it |
THE PART THAT DECIDES THE FINISH
Preparing the surface — by what you are painting over
Prep is three-quarters of a good finish. Find your wall below and do all of it before any paint goes on. Paint does not fix a surface; it records it.
Previously painted, sound walls
The usual case.
- Wash with sugar soap and warm water, top to bottom, with a sponge; rinse with clean water and let it dry — grease, cooking film and nicotine stop paint bonding and show as patches
- Fill nail holes, hairline cracks and dents with ready-mixed filler on a filler knife; two thin passes on anything deeper than 3 mm, left to dry between
- Sand filler flush with 120-grit on a block, then a quick pass over the whole wall with 180–240 to key it; wipe the dust off with a damp cloth
- Spot-prime the filled patches with a mist coat or the top-coat thinned, or they flash dull through the finish
New or bare plaster
New-build, re-plastered rooms, big repairs.
- Wait until it has dried out fully — pale pink or grey all over, no dark patches; a week or more per coat of plaster, longer in winter
- No sanding and no washing: new plaster is soft and powders
- Mist coat: emulsion thinned about 20% with water (the tin gives its own ratio), rolled on and left to dry — it seals the plaster so the top coats do not dry too fast and peel
- Then two full coats as normal; do not use vinyl silk as the first coat on new plaster
Walls with cracks and damaged plaster
Settlement cracks, blown patches, old damage.
- Rake out a hairline crack to a shallow V with the corner of a scraper so the filler has something to grip, dust it out, dampen, fill, sand
- A crack that keeps opening gets a flexible filler or a crack-bridging tape set in filler, not more hard filler
- Plaster that sounds hollow when tapped has come away from the wall — cut it back to sound plaster and patch with a one-coat plaster or bonding; a patch bigger than a dinner plate is a plasterer's job
- Prime bare patches before painting (mist coat)
Previously wallpapered
Paper on, or just stripped.
- Painting over paper: only if it is firmly stuck everywhere, no seams lifting, no texture you will regret — test a patch, since water-based paint can soak the paper and lift it; a coat of oil-based or shellac primer stops that
- Stripping: score the paper, soak with warm water and a little washing-up liquid or use a steam stripper, scrape, then wash all the old paste off the wall with sugar soap — dried paste under paint shows as a crazed, shiny pattern
- Fill the gouges stripping always leaves, sand, and mist-coat any bare plaster
Stained, damp or mouldy walls
Brown water marks, black spots, nicotine.
- Find the cause first — a stain painted over returns within weeks: a leak, condensation, a cold external corner, a blocked gutter outside
- Mould: wash with a fungicidal wash (not bleach alone), let it dry fully, and use a mould-resistant paint in bathrooms and kitchens; mould larger than a hand or that returns is a ventilation or damp problem, not a painting one
- Water stains and nicotine: a stain-block primer (shellac or oil-based) over the mark before the emulsion; emulsion alone will never cover them
- Damp plaster must be fully dry before anything — a meter reading, or a sheet of cling film taped to the wall overnight showing no moisture under it
Woodwork — skirting, doors, frames
Previously glossed or bare.
- Previously painted: wash, then sand with 180–240 to take the shine off completely — gloss on gloss peels; fill dents with wood filler; dust
- Flaking paint: scrape back to a firm edge, feather the edge with sandpaper, spot-prime bare wood
- Bare wood: knotting solution on knots or they bleed resin through white paint, then wood primer, then undercoat, then the top coat
- Caulk the gap between skirting and wall with decorator's caulk, smoothed with a wet finger — it is the single most professional-looking thing on the list
Ceilings
Painted, artexed or stained.
- Wash if there is any cooking film (kitchens, open-plan) — it is the main reason ceiling paint goes patchy
- Hairline cracks along the board joints: fill, sand, and if they keep returning use a flexible filler or a lining paper
- Textured (artex) ceilings in houses built or textured before the mid-1980s may contain asbestos — do not sand or scrape; paint over with a roller, or get it tested
- Water stains: find and fix the leak, dry fully, stain-block, then paint — twice
- <h2 style="font-size:34px;line-height:1.15;max-width:760px"
THE JOB
The steps, in order
Set up the room
45 minEmpty what you can; push the rest to the centre and cover it with plastic sheets. Cotton dust sheets on the floor, taped at the skirting so they do not creep. Turn off the lighting and socket circuits at the board, unscrew the switch and socket covers, bag the screws, and tape over the open fittings. Take down curtains, blinds and pictures; take the doors off their hinges if you are painting them. Open the windows.
- Good light matters: a work lamp set low and to one side shows every ridge and miss
- Keep a damp cloth and a bucket of clean water in the room for drips and spills
Mistake to avoid: Painting around a socket cover instead of removing it — the ragged edge shows every time the light is on.
Prepare the surfaces
2–4 h + dryingWork through the surface section above for every wall, the ceiling and the woodwork: wash, fill, sand, dust, spot-prime. Then mask: low-tack tape along the top edge of the skirting, around window frames and sockets, along the ceiling line if you are not confident cutting in freehand. Press the tape edge down with a filler knife so paint cannot creep under it.
- Fill in the morning so it is dry to sand by the afternoon
- Run your hand over every wall with your eyes closed before you paint — you will feel what you cannot see
Mistake to avoid: Painting the same day you fill: filler shrinks as it dries and the dent comes back under the paint.
Mist coat bare plaster and filler
30 min + 2 h dryingOnly where plaster or filler is bare: thin emulsion with water (about 20%, or the ratio on the tin), stir well, and roll it on. It will look thin and patchy; that is correct. Leave it to dry fully. Skip this on sound, previously painted walls.
- Use the wall colour or plain white — never a vinyl silk
- A mist coat that is too thick sits on the surface and peels; thin it properly
Mistake to avoid: Skipping it is why filled patches show through as dull spots in the finished wall.
Ceiling first, two coats
1–1.5 h per coatPour paint into the tray, load the roller and roll off the excess on the tray's ridges until it is evenly coated, not dripping. Cut in a 5 cm band around the edge of the ceiling with the angled brush. Then roll in sections about a metre square, working across the room away from the window so you can see the wet edge, overlapping each section into the last while it is still wet. Finish each section with one light pass in the same direction. Let it dry (check the recoat time on the tin, usually 2–4 hours) and do the second coat the same way.
- Hold the roller with light pressure — pressing hard squeezes paint into ridges at the edges
- Wear a hat and cheap safety glasses: ceilings spit
- A roller on an extension pole saves the ladder and your shoulders
Mistake to avoid: Rolling towards the light and stopping halfway — every lap mark and dry edge shows from the doorway.
Cut in the walls
45 min per coatLoad the angled brush a third of the way up the bristles, tap off the excess (do not wipe it on the rim — it starves the brush). Paint a band about 5 cm wide along the ceiling line, down the corners, around sockets, switches and frames, and above the skirting. Hold the brush like a pen, bristles pointing along the line, and pull a steady stroke, letting the paint flow to the edge rather than pushing the bristles into it. Do one wall at a time so the band is still wet when you roll up to it.
- If you masked the ceiling line, paint slightly over the tape; if not, leave a hair's gap rather than touching the ceiling
- Keep the brush moving; a loaded brush left on the wall leaves a blob
Mistake to avoid: Cutting in the whole room first and then rolling — the band is dry by the time the roller meets it and shows as a frame around each wall.
Roll the walls
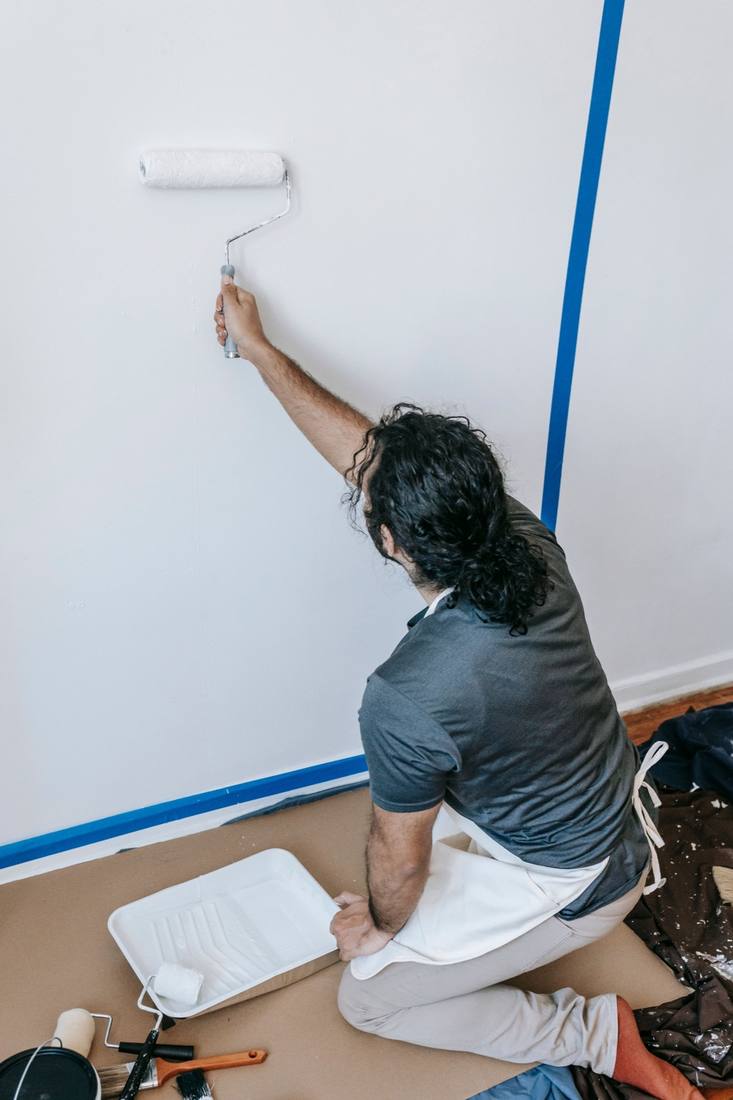
1 h per coatStart about 30 cm in from a corner, at head height. Roll a large W or M about a metre tall, then fill it in with vertical strokes without lifting the roller, working into the wet cut-in band. Move along the wall in overlapping sections, reloading when the roller starts to drag or sound dry. Finish each section with one light downward pass from top to bottom to lay the texture the same way. Work one full wall, then the next; never stop mid-wall.
- Keep the wet edge: if you have to pause, pause at a corner
- Reload before the roller is dry — a dry roller pulls the paint off
- Check the wall from an angle with the work lamp before moving on
Mistake to avoid: Pressing the roller hard or going back over paint that has started to dry — it drags and leaves tram lines and lifted patches.
Second coat on the walls
After 2–4 hCheck the recoat time on the tin and wait the full time — touch-dry is not recoat-dry. Same order: cut in, then roll, one wall at a time. Almost every emulsion needs two coats for an even, solid colour whatever the tin promises; a dark-to-light change may need three. Look across each wall against the light before you call it done.
- Lightly sand any nibs or drips from the first coat with 240-grit and dust off before the second
- Keep a note of which wall you cut in first so you keep the same rhythm
Mistake to avoid: Recoating too soon drags the first coat off in patches, which then needs a third coat to hide.
Woodwork last
1.5 h + overnightLightly sand the skirting, door and frames with 180–240 to key them (you did the heavy sanding in prep), dust, and wipe with a damp cloth. Undercoat bare or filled areas. Brush on satin or gloss in thin coats along the grain, laying off with light strokes in one direction; a 2-inch brush for skirting, a small roller and brush for a flat door. Two thin coats beat one thick one.
- Paint doors in order: panels, then the rails, then the stiles, then the edges
- Satin or gloss sags on vertical surfaces if it is put on thick — thin coats, and check back after ten minutes for runs
Mistake to avoid: A thick coat that runs — a run in gloss has to dry hard, be sanded out and repainted.
Remove the tape and put the room back
45 minPull masking tape while the last coat is still slightly soft — within an hour or so — slowly, back on itself at about 45°; if the paint has hardened, score along the tape edge with a blade first. Covers back on the sockets and switches (power still off, then on). Fold dust sheets inwards so the dried flecks do not scatter. Furniture back after 24 hours; nothing pressed against the walls for a week.
- Keep a labelled jar of each colour for touch-ups
- Photograph the tin label — brand, colour name, finish, batch — before you throw it out
Mistake to avoid: Leaving tape to dry hard, then ripping it off — it takes the paint edge with it.
The mistakes that show
- Painting over dust — the finish feels gritty and peels at the edges; wash and wipe first
- One thick coat instead of two thin — drips, runs and a patchy colour
- Cheap rollers shedding fibres into the paint — buy a decent sleeve, it is the cheapest upgrade in the room
- Stopping mid-wall for lunch — the dried edge shows as a band; finish the wall
- Cutting in the whole room first, then rolling — the band is dry by the time the roller meets it
Stop and get a painter if
- The wall is damp, stained brown, or the paint bubbles as it dries — there is water behind it and painting hides it for a month
- Plaster sounds hollow when tapped or comes away with the old paint
- You find lead in old paint, or black mould larger than a hand
- The job needs a tower or ladders on the stairs
| WHAT YOU SEE | WHY, AND THE FIX |
|---|---|
| Patchy dull spots in the finish, called flashing | Filler or bare plaster was not primed, or the wall was greasy. Spot-prime the patches, then put another FULL coat over the whole wall — a patch repair flashes in its own right. |
| Roller marks and tram lines | Too much pressure, too dry a sleeve, or going back over setting paint. Sand lightly when hard and recoat a full wall with a well-loaded roller and no pressure. |
| Paint bled under the masking tape | The edge was not pressed down, or the tape went on a dusty surface. Cut the line back with a sharp blade, touch in with the correct colour by brush, and next time seal the tape with the old colour first. |
| The new paint is peeling in sheets | The surface was greasy, still damp, or the sugar soap was not rinsed. Scrape back to a sound edge, wash and rinse properly, prime and repaint; there is no shortcut. |
| Brush marks standing proud on the woodwork | The paint was too thick, or it was brushed after it began to set. Sand flat with 180 grit and apply a thinner coat, laying off in one direction. |
| A knot or a water stain keeps coming through | Ordinary emulsion will not block either. Use a knotting solution on resin and a stain-blocking primer on water marks — and fix the water first, or it returns. |
| The second coat lifted the first | The first coat was not dry through. Let it harden fully, sand back the damage, and respect the recoat time on the tin rather than the feel of it. |
| The colour looks nothing like the tester | Light and surrounding colours change it. Testers should be painted in a square at least A4-sized, on the wall it is for, and looked at in daylight and at night before you buy ten litres. |
WHAT YOU SAVE
DIY cost against the guide price
| Wall and ceiling emulsion | €55–95 |
|---|---|
| Woodwork paint | €18–30 |
| Roller, sleeves, brushes, tray | €25–40 |
| Filler, sugar soap, abrasive, tape, sheets | €20–35 |
| Total, 4 × 4 m room | €120–200 |
| DIY total | €90–€160 |
Guide prices compiled by the Locufy team from published Irish and UK provider price lists and 2026/27 cost guides. Updated 2026.
Against a painter's own quote for the same room — the price guide has the current band — doing it yourself is mostly buying your own weekend.
RATHER NOT?
Painters and decorators near you, with prices shown
The ones who cover your area, nearest first, with one score from every review. No account needed to look.
Or post the job free and let them come to you.
Emulsion is touch-dry in hours and hard in days. Do not scrub a new wall or push furniture against it for a week.
A litre with the room and the date on the lid, for the scuff you will get in March.
Let it dry solid in the tin, then take it to your local civic amenity site (mywaste.ie lists them). Never pour it away.
Write the actual litres on the inside of a cupboard door. Next time you will buy the right amount first.
Painting a room: questions people ask
Work out the wall area — perimeter × ceiling height, less doors and windows — divide by the coverage on the tin, and multiply by two coats. A 4 × 4 m room with 2.5 m ceilings is about 36 m² of wall, which at 13 m² per litre needs about 5.5 L for two coats. Buy the next tin size up.
Dulux gives 2–4 hours for its Matt and about 4 hours' drying for Easycare Washable & Tough Matt; the tin states its own figure. Touch-dry is not recoat-ready — an early second coat drags and can lift the first.
On new plaster, yes — a mist coat of emulsion thinned about 10% with water. On filler and bare patches, yes, or they flash. On bare or knotty wood, yes, with knotting solution on the knots. On sound previously painted walls, no; sanding is enough.
You can, and it is a legitimate shortcut on firmly stuck woodchip, but the seams will telegraph and any moisture will lift it. If a corner peels cleanly, strip it instead — and wash the paste residue off, because paint slides on old paste.
Almost always unprimed filler or a greasy wall. Spot-prime the patches and apply another full coat; patch-painting a flashed area just creates a second patch.
Keep a labelled litre for touch-ups, let the rest dry solid in the tin, and take it to your local civic amenity site (mywaste.ie lists them). Never pour paint or paint water down a drain.
MORE GUIDES
More DIY guides in home repairs & handyman
Sources — checked October 2026
- HSA — work at height
- MyWaste.ie — household hazardous waste, including paint
- Dulux — Matt: coverage up to 14 m² per litre, two coats, 2–4 hours between
- Dulux — Easycare Washable & Tough Matt: up to 13 m² per litre, about 4 hours to dry
- Dulux — paint calculator and the note that coverage varies by surface and range