DIY GUIDE · TRADES & CONSTRUCTION · CHECKED OCTOBER 2026
How to insulate an attic yourself
A day. €400–€660 in mineral wool rolls for an average attic, depending on what is there already.
Boards to kneel on, first layer between the joists, second across them, eaves clear, cables lifted, and no grant unless a registered contractor does it.
- Every step, start to finish
- Checked October 2026 — sources at the end
- Honest about when to call a pro
FIRST, THE HONEST ANSWER
Do it yourself, or get a builder?
Do it yourself if…
- The attic has a proper hatch and you can climb in safely from a fixed loft ladder or a stepladder you can hold onto
- The ceiling joists are visible and sound, with no signs of damp, rot or leaks from the roof
- The wiring in the attic is in good condition, and you can lift cables clear without disconnecting anything
- You are not applying for an SEAI grant; grant-supported work has to be done by a registered contractor
- You can work in a hot, dusty, cramped space for a few hours with breaks
Get a pro if…
- You want the SEAI attic insulation grant, which is paid only for work by a contractor on the SEAI Registered Contractor List
- Cables need moving, junction boxes are loose, or recessed downlights need replacing or rewiring
- There is no safe way into the attic, or the joists are hidden under old boarding you cannot lift
- You find damp, mould, daylight through the roof, or old loose-fill or board that might be asbestos
- You want rafter-level insulation, a converted attic or spray foam; that is a different job
Safety first
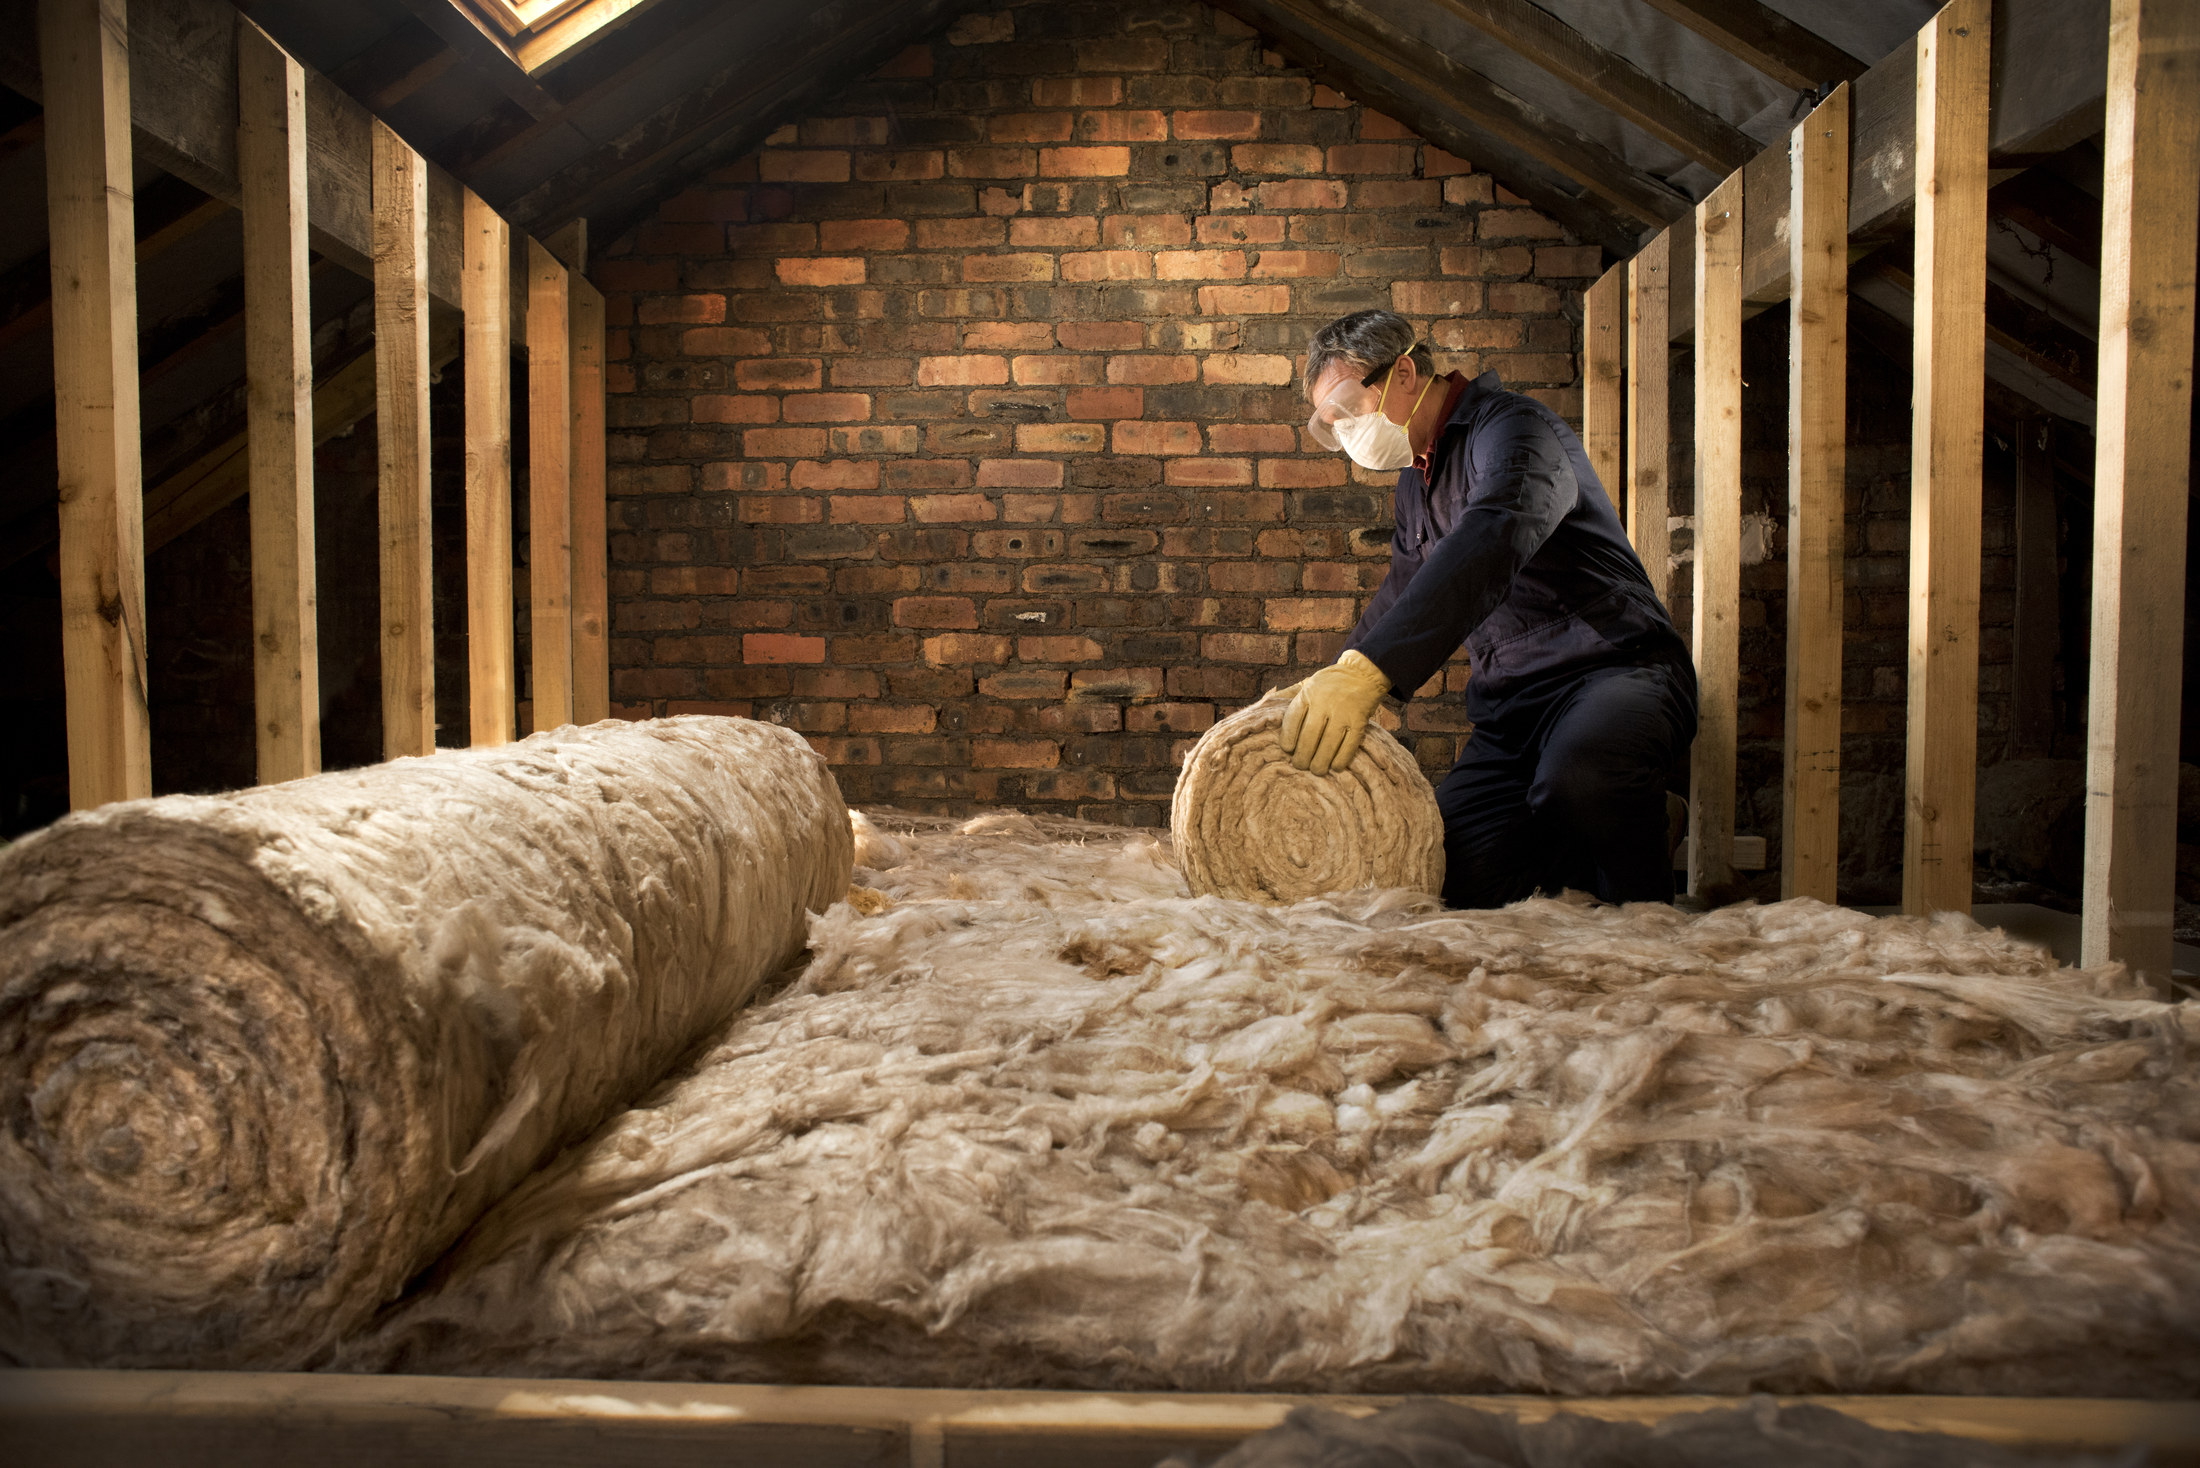
- Wear a half-face mask with P2 filters, goggles, gloves and long sleeves. The safety regulator says mineral fibres irritate the skin, eyes and airways, that hand-laying mineral wool exposes you to them, and that disposable dust masks are not effective.
- Kneel and move only on boards across the joists. The ceiling below cannot take your weight, and a fall through it injures you and damages the room below.
- Use a ladder only for getting in and out, keep three points of contact, and pass materials up rather than carrying them. The safety regulator's ladder guidance limits ladders to short, light work with a handhold.
- Do not cut, move or connect any cable, junction box or light fitting. Restricted electrical works in a home may only be done by a Registered Electrical Contractor registered with Safe Electric.
- Take breaks and drink water; attics get hot quickly and the work is hard on the knees and back.
- Stop if you find loose-fill or board you do not recognise in an older house; it could contain asbestos and must not be disturbed.
Stop here: Anything electrical, and any work you want a grant for
The Electricity Regulation Act 1999 reserves restricted electrical works in a home to a Registered Electrical Contractor: they may only be carried out and certified by a contractor registered with Safe Electric, and unregistered parties face prosecution; moving cables, rewiring downlights or fitting new ones in the attic falls under that. Separately, the SEAI grant for attic insulation is paid only when a contractor on the SEAI Registered Contractor List does the work, with the application made first. How to hire a loft insulation installer →
| MATERIAL | COVERAGE | FOR THIS JOB |
|---|---|---|
| Mineral wool roll for between the joists | 100mm rolls covering 11.09 square metres each | Attic of 42 m² with nothing in it: four rolls |
| Mineral wool roll for the cross layer | 200mm rolls covering 5.50 square metres each | Attic of 42 m²: eight rolls |
| Raised storage legs and boards | Legs taller than the full depth of insulation | Only for the area you will store things on |
| Tank and pipe lagging | Sized for the tank and the pipe diameters | One tank jacket and lengths for the pipes |
| Hatch insulation and draught strip | At least one 100mm layer on the hatch | One offcut and one strip |
How many rolls
36 m² of wall → 13.1 L for 2 coats. Buy about 13.5 L.
Rolls = attic floor area ÷ area covered by one roll, rounded up, for each layer. An attic of 7 × 6 m is 42 m². The cross layer in 200 mm rolls covering 5.50 m² each is 42 ÷ 5.50 = 7.6, so eight rolls; a first layer in 100 mm rolls covering 11.09 m² each is 42 ÷ 11.09 = 3.8, so four rolls.
The joists take up some of the area of the first layer, but cutting waste makes up for it, so use the full floor area. Measure the attic floor, not the house's floor plan; eaves and a bathroom extension can add to it.
Glass mineral wool and stone wool rolls are the standard for insulating at ceiling level. They are sold in thicknesses for each layer. Thinner rolls are for between the joists; thicker rolls are for the cross layer. The rolls we priced come as 100mm rolls covering 11.09 square metres and 200mm rolls covering 5.50 square metres.
Measure the depth of what is there with a ruler pushed down to the ceiling. If it is level with the top of the joists, you need only the cross layer. If there is little or none, lay both layers. Do not compress old insulation to make room; flattened wool loses much of its value.
If you want to store things in the attic, boarding laid directly on the joists squashes the cross layer. Raise the boards on purpose-made legs above the full depth of insulation. The legs we priced are 175mm high and come in boxes of 12, so check they clear the depth you are laying.
The hatch is often the biggest cold spot. The maker we read wants the hatch cover insulated with at least 100mm of roll, held on with double-sided tape. Add a draught strip round the frame.
Do not insulate under the cold water tank; the heat rising from the room below helps stop it freezing. Instead, insulate the tank itself and the pipes in the attic with lagging made for them, and leave the area under the tank clear.
The SEAI scheme supports ceiling-level attic insulation, but the customer must choose a contractor from the list SEAI keeps, and the grant is claimed after the registered contractor completes the work. The code of practice we read says the works must not start before the grant application, and the home must have been built before the end of 2010. Doing it yourself saves the labour but forfeits the grant.
THE PART THAT DECIDES THE FINISH
Before you start — the attic and the space
What is in the attic now decides how much you lay and what you must leave alone. Go up with a torch before buying anything, standing only on boards across the joists, and find your attic below.
An attic with old insulation between the joists
The most common case in Irish houses.
- Measure the depth of the old wool at several points and check it is dry
- Fluff up flattened wool and fill bare patches between the joists
- Plan the cross layer over everything, at right angles to the joists
- Look for damp patches; wet insulation means a roof or plumbing leak to fix first
An attic with no insulation
Older or unaltered houses.
- Plan both layers: the first between the joists, the second across
- Measure the clear gap between joists; the maker we read notes that 400mm or 600mm centres include the joist's own width
- Check the ceiling below is sound; old lath and plaster ceilings crack easily
- Look for loose-fill or old board you do not recognise, and stop if it could be asbestos
An attic with cables, junction boxes or downlights
Almost every attic.
- Look but do not touch the connections; note any cracked boxes, bare wires or scorch marks for an electrician
- Plan to lift cables so they sit on top of the insulation, not buried in it, as the maker we read advises where possible
- Find any recessed downlights from below and mark them; they need a cover or clearance before wool goes near them
- Leave any wiring that has to be moved or replaced to a Registered Electrical Contractor
An attic with a water tank and pipes
Cold water storage in the attic.
- Leave the ceiling under the tank uninsulated
- Plan a raised walkway to the tank so you can reach it later without crushing the insulation, as the maker we read suggests
- Measure the tank and pipes for lagging
- Check the tank has a lid and the overflow is clear
The eaves
Where the roof meets the attic floor.
- Find the ventilation openings at the eaves; you will see daylight or a vent tray
- Plan to stop the insulation short of them so air can still flow
- Buy eaves ventilators if the felt sits right on the joists
- Check for birds' nests and wasps before you crawl into the eaves
THE JOB
How to insulate an attic
Set up the access and a safe walkway
1 hourSet the loft ladder or a stepladder you can climb holding on with one hand, and keep three points of contact going up and down, as the safety regulator's ladder guidance asks. Pass the rolls and boards up rather than carrying them while climbing. In the attic, lay boards across the joists to kneel and move on. Hang a battery light. Then go to the section above and work through the list for your attic.
- Have a helper pass materials up and stay within shouting distance
- Mark the hatch with tape so you know where it is in the dark
- Do the work early on a warm day; attics get very hot by afternoon
Mistake to avoid: Stepping between the joists. The plasterboard ceiling below gives way at once, and you can fall through into the room.
Prepare the attic floor
1 hourClear stored items to one side or out. Lift cables gently so they will sit on top of the new insulation, without pulling on connections. Fit covers or keep clear space round recessed downlights, as their maker or your electrician advises. Fit eaves ventilators where the felt reaches the joists. Note any electrical fault for a Registered Electrical Contractor.
- Never cut, disconnect or reroute a cable yourself
- Lay a walkway to the tank and the hatch before insulating
- Bag rubbish and old wrappers as you go
Mistake to avoid: Burying cables in wool. Cables run warmer under insulation and may need to be rated for it, which is an electrician's judgement.
Put on protection and open the rolls
15 minutesPut on long sleeves, gloves, goggles and a half-face mask with P2 filters. Open the rolls in the attic, cutting the wrapper with care so you do not slice the wool. Let them expand for a few minutes before laying.
- Tape cuffs over gloves so fibres do not get in
- Keep the mask on whenever you are handling the wool
- Work facing away from your helper when you cut
Mistake to avoid: Using a paper dust mask. The safety regulator says disposable masks are not effective against mineral fibres; a P2 half-mask is.
Lay the first layer between the joists
2 hoursMeasure the clear gap between the joists and cut the roll to that width plus a little, so it fits snugly without being forced; the maker we read allows an extra 10mm on width and length. Roll it out between the joists from the eaves towards the hatch, pressing it gently into the corners. Butt each roll tightly to the next, with no gaps.
- Stop short of the eaves vents
- Tuck the wool under cables, not over them
- Keep the area under the cold water tank clear
Mistake to avoid: Leaving gaps where rolls meet. Every gap is a cold spot, and the maker we read says visible gaps reduce how well the whole layer works.
Lay the cross layer
2 hoursRoll the thicker layer across the joists at right angles to the first, so it covers the tops of the timbers too. Start at the far end and work back towards the hatch, butting each roll tightly to the last. Lay it over the walkway areas only where you have raised boards on legs; elsewhere, leave the walkway boards in place on top of the joists along your access route.
- Do not compress the cross layer to fit under low rafters; trim it
- Keep cables on top of the new layer where you can
- Work backwards so you never kneel on finished insulation
Mistake to avoid: Laying the second layer in the same direction as the first. The joists stay uncovered, and heat leaks through the timber.
Keep the eaves ventilated
30 minutesAt the eaves, stop the insulation short of the vents or fit ventilators so air can flow from the eaves over the insulation. The code of practice for grant work we read is clear that insulation must not compromise ventilation or increase the risk of condensation; the same applies to your own work. Check you can still see daylight or the vent opening at each eave.
- A gap of a hand's width between insulation and the felt helps airflow
- Do not stuff wool into the eaves to stop draughts
- Check both sides of the roof
Mistake to avoid: Blocking the eaves. Warm, moist air from the house condenses on the cold roof timbers, and mould and rot follow.
Lag the tank and pipes
30 minutesFit a jacket to the cold water tank and its lid, leaving the area under it uninsulated so heat from below reaches it. Fit pipe lagging round every pipe in the attic, cut to fit round bends and taped at the joins. Lag any overflow and vent pipes too.
- Lag the pipes right to where they enter the ceiling
- Leave the tank's lid removable
- Check the ball valve can still be reached
Mistake to avoid: Insulating under the tank. The tank loses the warmth from the room below and is more likely to freeze.
Insulate and draught-strip the hatch
20 minutesFix an offcut of roll of at least 100mm to the top of the hatch cover with double-sided tape or a cover box, as the maker we read describes. Fit a draught strip round the hatch frame so it closes snugly.
- Check the hatch still opens and closes freely
- Box the insulation if it would shed fibres into the room
- Fit a catch so it closes tightly against the strip
Mistake to avoid: Leaving the hatch bare. A lot of warm air escapes through an uninsulated, draughty hatch, and it is often where condensation shows first.
Check, clean up and come down safely
30 minutesLook over the whole attic with the light. Check for gaps, for cables buried in the wool, and that the eaves vents and the tank are clear. Bag offcuts and wrappers. Come down facing the ladder with a hand free. Take off your protective clothing outside if you can, rinse your hands and face in cold water before washing, and wash the clothes separately.
- Vacuum the landing; fibres fall through the hatch
- Rinse in cold water first so your pores do not open to the fibres
- Leave a note of what you laid and when inside the hatch
Mistake to avoid: Shaking your work clothes out indoors. The fibres settle on the carpet and furniture and irritate everyone's skin.
The mistakes that show
- Stepping between joists and putting a foot through the ceiling
- Laying both layers in the same direction so the joists stay bare
- Stuffing the eaves and blocking the ventilation
- Insulating under the cold water tank
- Burying cables and downlights in wool
- Crushing the insulation under storage boards
Stop here and get a loft insulation installer
- You want the SEAI grant, which pays only for work by a registered contractor applied for before the work starts
- Cables, junction boxes or downlights need moving, replacing or rewiring
- There is damp, mould or a roof leak, or material that might be asbestos
- There is no safe access, or the joists are hidden under fixed boarding
| WHAT YOU SEE | WHY, AND THE FIX |
|---|---|
| Condensation or mould on the roof timbers | The eaves ventilation is blocked or there is not enough of it. Pull insulation back from the eaves, fit eaves ventilators and keep the hatch sealed; if mould persists, get the roof ventilation checked. |
| The cold water tank or pipes froze | The area under the tank was insulated, or pipes were left bare. Clear the wool from under the tank and lag the tank and every pipe. |
| Itchy skin and eyes after the job | Mineral fibres. Rinse in cold water, then wash; the safety regulator recommends moisturising cream after washing. Wear long sleeves, gloves and goggles next time. |
| A crack appeared in the ceiling below | Weight was put on the ceiling between joists. Small cracks can be filled and painted; a sagging or broken ceiling needs repair before anything else. |
| The rooms below feel no warmer | Gaps, compressed wool or a bare hatch. Look for patches where the wool was crushed or missing, and check the hatch and the eaves for gaps. |
| Stored boxes have crushed the insulation | Boards were laid straight on the joists. Raise the storage area on legs taller than the full depth of the insulation. |
| A downlight or cable feels hot | Insulation is too close or the fitting is not suitable for contact with insulation. Pull the wool back at once, switch that circuit off and have a Registered Electrical Contractor check it. |
| Damp patches in the wool | A roof or plumbing leak. Remove the wet wool, find and fix the leak, and replace it once dry. |
WHAT YOU SAVE
What it costs to do it yourself
| Cross layer only, eight 200mm rolls | €400–€440 |
|---|---|
| First layer, four 100mm rolls, if there is none | €200–€220 |
| Total, insulation rolls | €400–€660 |
| Optional: raised storage legs, box of 12 | €19.99 |
| DIY total | €400–€660 |
Guide prices compiled by the Locufy team from published Irish and UK provider price lists and 2026/27 cost guides. Updated 2026.
Prices from an Irish DIY retailer's insulation range for October 2026, where the rolls sold at €54.99 each or two for €100. Add masks, lagging and boards if you need them. The professional price, from the price guide, is shown alongside; an SEAI-registered contractor's price may be offset by the grant.
RATHER NOT?
Loft insulation installers near you, with prices shown
The ones who cover your area, nearest first, with one score from every review. No account needed to look.
Or post the job free and let them come to you.
Mineral wool offcuts are building waste. Bag them tightly and take them to a civic amenity site; mywaste.ie lists what each site accepts for building materials. Plastic wrappers go in the recycling if clean, and any rigid polystyrene can go to a civic amenity centre that collects it.
Rinse in cold water before washing, wash work clothes separately, and use a moisturiser if your skin is irritated, as the safety regulator suggests.
Store things only on raised boards, keep the walkway to the tank clear, and look in once a year for damp or crushed areas.
Note the date, the depth and the product inside the hatch and with your house papers. A building energy assessor will want to know what was installed.
Insulating an attic between and over the joists: questions people ask
Yes. Laying mineral wool between and across the joists is work a householder may do, with boards to kneel on, the eaves kept clear, cables lifted rather than buried and the tank and pipes lagged. Electrical work and grant-funded work are for registered contractors.
No. Under the scheme's code of practice, the customer chooses a contractor from SEAI's register and claims the grant after the registered contractor completes the work. The application must come before the work.
Two layers: the maker we read puts the first between the joists at generally 100 mm and the cross layer at 170 or 220 mm, so the joists are covered as well.
No. Leave the ceiling under the cold water tank bare so warmth from below reaches it, and insulate the tank and pipes themselves.
Yes. Air must flow in at the eaves and over the insulation; blocking it causes condensation and rot in the roof timbers.
The Locufy price guide for Ireland puts attic insulation at €400–€1,500 per job, with €800 typical, before any SEAI grant.
MORE GUIDES
More DIY guides
Sources — checked October 2026
- ROCKWOOL — Roll, Twinroll and Rollbatt installation guide: pre-work safety check including electrical safety; kneel board and knee pads; measure the internal aperture, 400mm or 600mm centres; allow an extra 10mm; no visible gaps; not directly under cold water tanks; raised walkway; hatch at least 100mm; lift cables free where possible; first layer generally 100 mm between joists, second layer 170 and 220mm cross-laid
- HSA — Machine Made Mineral Fibres information sheet: irritation of skin, eyes and airways; hand laying mineral wool; P2 filter half or full mask; disposable dust masks not effective; goggles; moisturising cream after washing
- HSA — Using Ladders Safely information sheet: short-duration light work, handhold, three points of contact
- SEAI — Better Energy Homes Contractor's Code of Practice, version 1.20, 2026 (read 16 October 2026): ceiling-level attic insulation is a supported measure; the customer must choose a contractor from SEAI's registered list and claims the grant after the works; works dated after the application; dwellings built before 31 December 2010; measures must not compromise ventilation or condensation risk
- Safe Electric — Restricted Electrical Works: under the Electricity Regulation Act 1999 and S.I. No. 264 of 2013, only a Registered Electrical Contractor may carry out and certify them; unregistered parties face prosecution
- HSA — asbestos information sheet: asbestos can be hidden in buildings built or refurbished before 2000; stop and get advice
- MyWaste — rubble and building material: to the local civic amenity site, with the list of items each accepts
- MyWaste — polystyrene: some civic amenity centres accept it
- Woodie's — insulation price check, October 2026: 100mm attic roll 11.09 sq m €54.99; 200mm attic roll 5.50 sq m €54.99; two for €100; loft legs 175mm, box of 12, €19.99