DIY GUIDE · GARDEN & OUTDOOR · CHECKED OCTOBER 2026
How to set up garden irrigation yourself
An afternoon for two or three beds. €150–€195 in parts for a 10 m drip system.
Planning the runs, fitting a timer and filter, laying drip line, run times, and where it stops.
- Every step, start to finish
- Checked October 2026 — sources at the end
- Honest about when to call a pro
FIRST, THE HONEST ANSWER
Do it yourself, or get a gardener?
Do it yourself if…
- There is already an outside tap, fitted by a plumber, within reach of the beds
- The system will sit on the surface or just under mulch, with no buried pressurised pipe
- It is for beds, borders, pots, a polytunnel or raised beds rather than a whole lawn
- The timer is battery-powered or mechanical, with nothing to wire in
Get a pro if…
- You need a new outside tap or any change to the plumbing; that is plumber's work
- You want buried sprinklers for a lawn, a pump from a tank or well, or a multi-zone mains-powered controller
- The system would need a new electrical supply in the garden
- Water pressure or flow at the tap is poor and the system will not run properly
Safety first
- Connect only to an existing outside tap. Making a new connection to the water supply, or altering the pipework, is work for a plumber, and the supply has to be protected against water flowing back into it.
- Fit the timer and filter to the tap only, and never leave a hose or drip line lying in a water butt, a pond or a bucket of feed while it is connected to the mains.
- Do not wire anything into the house supply. A mains-powered controller or pump on a new circuit is restricted electrical work that only a Registered Electrical Contractor may do.
- Check whether a Water Conservation Order is in force before you water; during an order, using a hosepipe or similar apparatus to water a garden is prohibited for the period it covers.
- Lay supply pipe along bed edges, not across paths, where it is a trip hazard.
- Lift a full water butt or watering can with your legs; water weighs a kilogram a litre, and the HSA's manual handling guidance warns against lifting loads held away from the body.
Stop here: Anything connected into the mains pipework or wired into the house
Any permanent connection to the public water supply must be protected so that water cannot flow back into it; that is plumbing to the backflow standard I.S. EN 1717, not a job for a push-fit kit. Fitting a new outside tap, a pump or a buried pressurised system is work for a plumber. A mains-powered controller or pump on a new garden circuit is restricted electrical work under the Electricity Regulation Act, which only a Registered Electrical Contractor may do, and Safe Electric reports unregistered work for prosecution. Under section 56 of the Water Services Act 2007, Uisce Éireann can make a Water Conservation Order, and when one is in force it can prohibit using a hosepipe or similar apparatus to water a garden. How to hire an irrigation installer →
| MATERIAL | COVERAGE | FOR THIS JOB |
|---|---|---|
| Tap timer | Mechanical or battery, for your tap's thread | One per tap |
| Inline filter | Fitted after the timer | One per system |
| Supply pipe | Plain pipe from the tap to the beds | The distance from the tap to the furthest bed, plus spare |
| Dripper pipe | With built-in emitters at a fixed spacing | The total length of plant rows to water |
| Push-fit fittings and pegs | Tap adaptor, tees, elbows, couplers, stop-ends | One tee per branch, one stop-end per line |
How much pipe and how long to run it
Dripper pipe = number of rows × row length. Supply pipe = the distance from the tap to each bed. Litres per run = number of drippers × the dripper's flow in litres per hour × hours run. Two raised beds 3 m long with two rows each need 12 m of dripper pipe; with a dripper every 30 cm that is 40 drippers, and at 2 L an hour each a 20-minute run gives about 27 litres.
Check your dripper's actual flow rate on the pack. Water deeply and less often rather than a little every day, and turn the timer off in wet spells.
Drip line has emitters built in at a fixed spacing and puts water exactly at the roots, with almost no waste; it is the best choice for beds, rows and raised beds. A soaker hose weeps along its whole length and suits a single border. Sprinklers throw water into the air, waste a lot to evaporation and are the first thing a hosepipe ban stops.
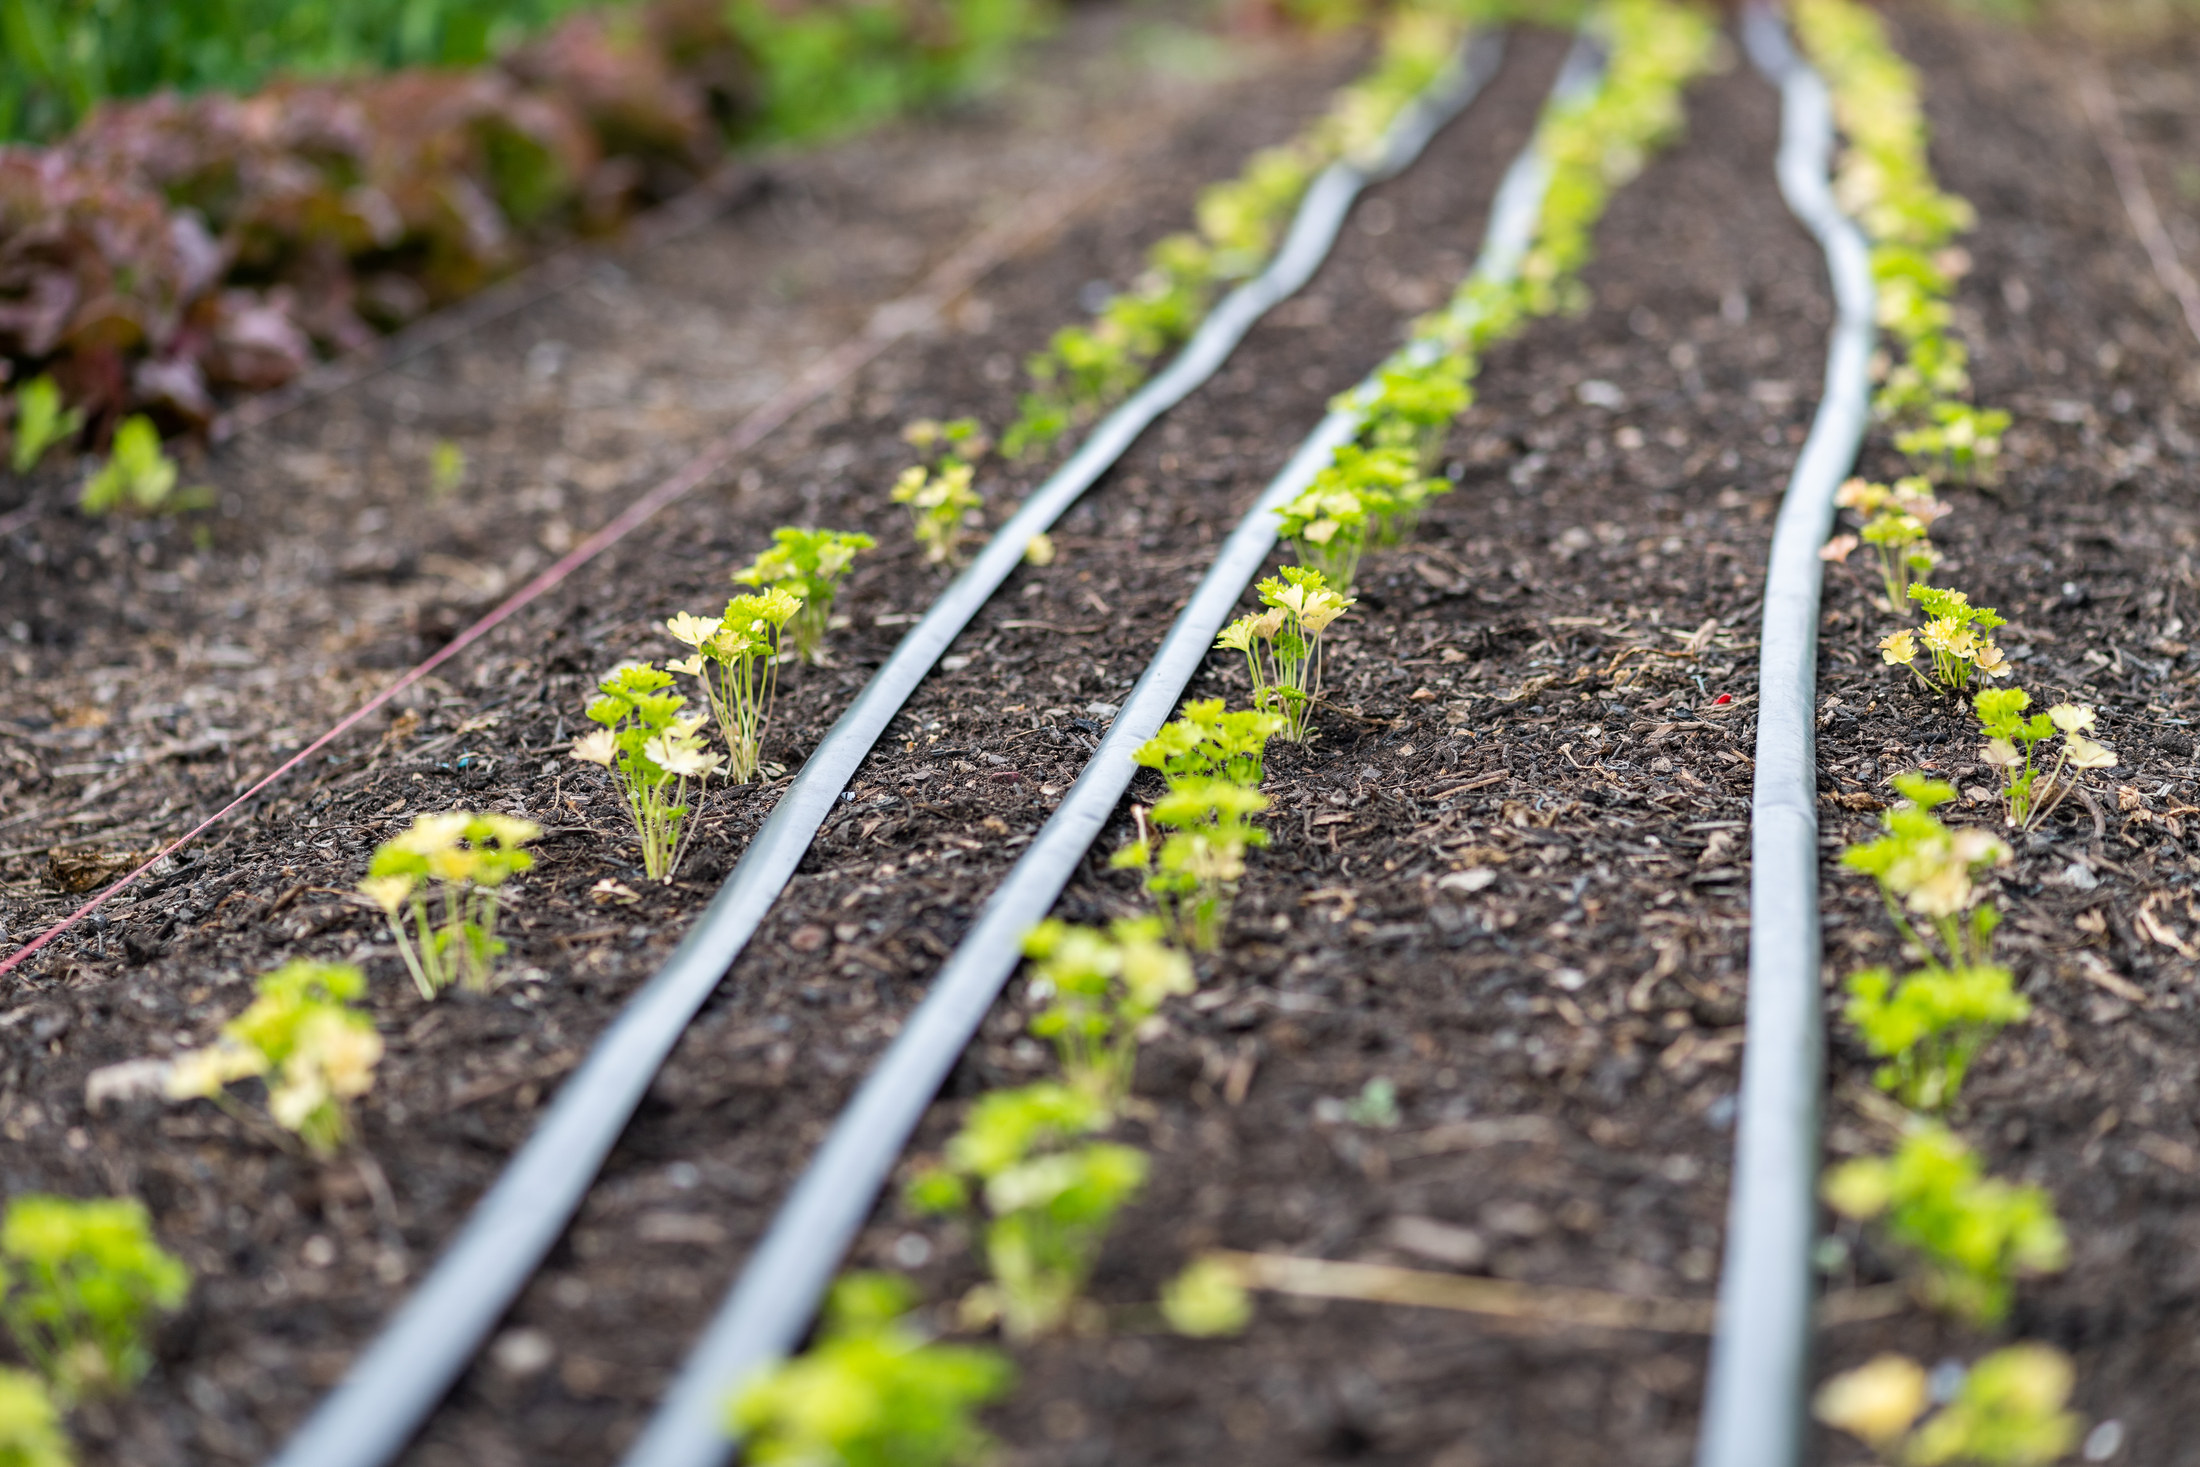
Most kits use two kinds of pipe of the same size. Plain supply pipe carries the water from the tap to each bed; dripper pipe, with emitters at regular intervals, runs along the plants. Joining them with push-fit tees, elbows and stop-ends lets you build any shape.
A mechanical tap timer needs no battery: you turn the dial for a run time and it shuts off. A battery timer runs on a schedule and can water early in the morning while you are asleep or away. Both screw onto the tap; neither needs wiring.
Drippers clog easily, so fit a filter at the start of the system. Many drip kits also include a pressure reducer, because mains pressure is higher than drippers like. Check the timer's working pressure range against what your tap delivers.
A water butt saves treated water and keeps working during a hosepipe ban, but its low pressure will only run a short drip line on a slope. Gravity drip systems from a butt work best when the butt is raised and the beds are below it.
THE PART THAT DECIDES THE FINISH
Before you start — the tap, the beds and the water
Look at what the system will connect to and what it will water before you buy a single fitting.
The outside tap
The tap the timer will screw onto.
- Check its thread size; tap timers fit the common sizes, and an adaptor covers the rest
- Turn it on fully and check the flow is strong and steady
- Check it is on a properly fitted outside tap, not a hose pushed onto a kitchen tap
- If there is no outside tap, stop and have a plumber fit one
Beds and borders
Shrubs, perennials and vegetables in the ground.
- Measure each bed and count the rows you want to water
- Note the slope; drippers at the low end of a long slope run more
- Plan the drip line along the plants, not between them
- Decide whether the line will sit on the soil or under a mulch
Raised beds and a polytunnel
Defined rectangles that suit drip line best of all.
- Measure each bed; one or two lines per bed is usual
- Plan a supply pipe from the tap to the corner of each bed, with a valve at each if you want to water them separately
- Allow for the height of the bed sides at the joints
- Keep the supply pipe along the bed edge so it is not stepped on
Pots and containers
Patio pots, window boxes and hanging baskets.
- Count the pots and group them along one line where you can
- Use small branch pipes and individual drippers to each pot
- Put a saucer under pots indoors or on decking
- Check the pots drain freely; drip watering can waterlog a pot with no hole
A water butt instead of the tap
Rainwater from the gutters.
- Raise the butt on a stand so the outlet is above the beds
- Fit a filter; rainwater carries debris that blocks drippers
- Keep the run short and the beds below the butt
- Never connect the butt to the mains pipework
THE JOB
The steps, in order
Check the tap and draw the plan
30 minStart with the checks above. Draw the garden roughly to scale on paper: the tap, each bed, and the route the supply pipe will take along walls and bed edges. Mark where you need a tee to branch off, an elbow to turn a corner, and a stop-end at the end of each line. Measure each length and add a little extra. This list is your shopping list.
- Route the supply pipe along the edge of paths and walls, not across the lawn
- Keep each dripper line under about the length the maker recommends so the far end still gets water
- Mark which beds you will want to water separately
Mistake to avoid: Buying a kit by guesswork and running out of pipe or fittings halfway round.
Fit the timer and filter to the tap
15 minTurn the tap off. Screw the timer onto the tap by hand, with its washer in place, and tighten only enough to stop it leaking; overtightening cracks plastic threads. Fit the filter to the timer's outlet, then the hose connector or adaptor that joins your supply pipe. If your kit has a pressure reducer, it goes between the filter and the supply pipe. Turn the tap on fully and check every joint for drips.
- The tap stays on fully; the timer does the switching
- Fit the filter where you can reach it to clean it
- Check the timer's arrow points the way the water flows
Mistake to avoid: Leaving out the filter and finding the drippers blocked with grit within a month.
Lay out the supply pipe
20–40 minUncoil the supply pipe and leave it in the sun for half an hour so it softens and lies flat. Run it from the tap along your planned route to the first bed. Cut it squarely with a sharp cutter at each point where you need a tee or an elbow. Push each pipe end fully onto its fitting until it seats; dip a stiff end in hot water first. Peg the pipe every metre or so so it does not move.
- Cut square; an angled cut leaks
- Push until the pipe passes the barb or seal completely
- Keep dirt out of the open pipe ends while you work
Mistake to avoid: Laying pipe straight from a cold coil and finding it springs back into loops that pull out of the fittings.
Run the dripper line along the plants
30–60 minAt each bed, join the dripper pipe to the supply pipe with a tee or an elbow. Lay the dripper pipe along each row of plants, close to their stems, with the emitters facing up or as the maker recommends. Turn at the end of a row with an elbow or a gentle loop, and finish each line with a stop-end. Peg it down every metre and close to each fitting.
- Lay the line before planting and plant beside the drippers
- Two lines down a wide bed water it more evenly than one
- Keep drippers on the root zone, not on paths or walls
Mistake to avoid: Laying drip line along the middle of a path between rows and watering the weeds.
Flush and test the system
15 minBefore fitting the last stop-ends, turn the water on for a minute to flush out any soil or plastic shavings that got into the pipes. Fit the stop-ends and run the system again. Walk every line and check each dripper is dripping and each joint is dry. Hold a cup under one dripper for a minute and multiply to check its flow against the pack.
- Check the far end of the longest line; it is the first to suffer
- Re-seat any joint that weeps by pulling it off, trimming the pipe square and pushing it back
- Mark the position of any buried pipe on your plan
Mistake to avoid: Fitting every stop-end before flushing and trapping the grit inside, right where it blocks the drippers.
Set the timer for the weather
10 minSet the run time and schedule. Water early in the morning, when less evaporates and leaves dry during the day. Start with one longer run every two or three days rather than a short run every day, so the water soaks deep and roots follow it down. A mechanical dial timer sets one run each time you turn it; a battery timer can repeat on a schedule.
- Check the soil a finger's depth down after the first run
- Turn the timer off in a wet spell
- Plants in pots need more frequent watering than beds
Mistake to avoid: Setting a long daily run in May and leaving it on through a wet June, waterlogging the beds.
Cover the line with mulch
20 minOnce the system works, spread a layer of bark, compost or straw over the soil and the drip line. Mulch slows evaporation, keeps the pipe out of the sun so it lasts longer, and hides it. Leave the fittings uncovered or mark them, so you can find them again.
- Mulch after a good watering, not over dry soil
- Keep mulch clear of plant stems
- Do not bury supply pipe deep; keep it accessible
Mistake to avoid: Burying the whole system under soil and losing track of every joint.
Check it every week in the season
10 minWalk the system once a week while it is in use. Look for dry patches, puddles, chewed pipe, pegs pulled out and joints pushed apart by a careless boot. Clean the filter every few weeks. Watch the weather and the water notices: when a Water Conservation Order is in force, the system must not be used for watering the garden from the mains.
- Unscrew the filter, rinse it and refit
- A dripper that has stopped can often be cleared by flushing the line
- Keep a few spare fittings in the shed
Mistake to avoid: Assuming it is working because the timer clicks, while one line has been disconnected for a fortnight.
Drain and store it for winter
30 minBefore the first hard frost, take the timer and filter off the tap, drain them and bring them indoors; water left inside cracks them when it freezes. Take the batteries out of a battery timer. Open the stop-ends and let the lines drain, then close them again. Leave the pipe in place under the mulch, or lift and coil it for winter.
- Lag or cover the outside tap itself against frost
- Store the timer somewhere dry and frost-free
- Check the washers in spring before refitting
Mistake to avoid: Leaving the timer on the tap all winter and finding it split in March.
The mistakes that show
- Leaving out the filter and blocking the drippers
- Watering a little every day so roots stay shallow
- Leaving the timer on the tap through a frost
- Running the system from the mains during a hosepipe ban
Stop here and get a plumber
- You need a new outside tap or any change to the pipework
- You want buried pressurised pipes, pop-up sprinklers or a pump from a tank or well
- The controller or pump needs a new electrical supply in the garden
- The flow from the tap is too weak to run the system
| WHAT YOU SEE | WHY, AND THE FIX |
|---|---|
| Some drippers not working | Grit or algae in the emitters. Clean the filter, open the stop-ends and flush the lines; replace any dripper section that stays blocked. |
| Far end of the line stays dry | The line is too long, or the tap flow is too low. Shorten the run, split it into two lines from a tee, or add a second supply pipe to the far end. |
| Joint keeps popping off | The pipe end was cut at an angle or not pushed fully home, or the pressure is high. Recut square, warm the pipe and push it on fully; fit a pressure reducer if the kit has one. |
| Puddles around one spot | A split pipe or a loose fitting. Find it with the water running, cut out the damaged section and join with a coupler. |
| Timer will not switch on | Flat batteries, or the tap is off. Replace the batteries, check the tap is fully open and check the program. |
| Leaves yellowing and soil soggy | Too much water. Reduce the run time and frequency and check the soil a finger's depth down before watering. |
| Pipe chewed or holed | Rodents, or a strimmer. Replace the section with a coupler and mulch over the line so it is out of sight. |
WHAT YOU SAVE
What it costs to do it yourself
| Mechanical or battery tap timer | €39.95–€74.95 |
|---|---|
| Inline filter | €54.95 |
| Supply pipe, 10 m | €19.95 |
| Dripper pipe, 10 m | €19.95 |
| Fittings and pegs | €15–€25 |
| Total, first time | €150–€195 |
| DIY total | €150–€195 |
Guide prices compiled by the Locufy team from published Irish and UK provider price lists and 2026/27 cost guides. Updated 2026.
The timer and filter are a one-off cost; adding another bed later is only pipe and a few fittings. A drip line uses a fraction of the water a sprinkler does for the same plants.
RATHER NOT?
Irrigation installers near you, with prices shown
The ones who cover your area, nearest first, with one score from every review. No account needed to look.
Or post the job free and let them come to you.
Collect rainwater from the gutters in a water butt and keep the beds mulched so less water evaporates; both make a drip system go further and keep it useful in a dry summer.
In a dry spell, watch for notices from Uisce Éireann. When a Water Conservation Order is in force, switch the timer off on any system fed from the mains.
Spent timer batteries go to a battery collection point in a shop that sells batteries or to a civic amenity site, as mywaste.ie advises; an electronic timer at the end of its life is electrical waste for a WEEE drop-off point.
Drain the timer and filter and bring them indoors before the frost; drain the lines and lag the outside tap.
Setting up garden irrigation: questions people ask
Yes, a surface drip system on an existing outside tap with a tap timer is a householder job. A new tap, buried pressurised pipe, a pump or anything wired in is for a plumber or a Registered Electrical Contractor.
Not from the mains. A Water Conservation Order prohibits using a hosepipe or similar apparatus to water a garden while it is in force. A system fed from a water butt is a different matter.
Long enough to wet the soil a finger's depth or more, then leave it two or three days. Check your dripper's flow on the pack and adjust for the weather.
Yes. Drippers have tiny openings that grit and algae block, and a filter at the tap end is the cheapest way to keep them clear.
Yes, on a short run with the butt raised above the beds, and with a filter. Never connect a water butt into the mains pipework.
The Locufy Irish price guide puts a garden irrigation system at €500–€3,000 per job, typically €1,200. That buys a professionally designed and fitted system.
MORE GUIDES
More DIY guides
Sources — checked October 2026
- Gardena — water timer: run time, operating pressure and tap threads
- Gardena — micro-drip system: start components, pressure and filter
- HSA — manual handling of loads, guide to the General Application Regulations
- Water Services Act 2007, section 56 — conservation of water and orders restricting hosepipe use
- Safe Electric — restricted electrical works
- mywaste.ie — batteries
- mywaste.ie — electrical gardening tools
- Quickcrop — price check and parts: drip irrigation parts picker
- Quickcrop — price check: manual water timer