DIY GUIDE · HOME REPAIRS & HANDYMAN · CHECKED OCTOBER 2026
How to assemble flat-pack furniture yourself
An hour for a bedside table, a day for a wardrobe. €5–€25 for tools and wall fixings.
Sort the parts, read the drawings, drive fixings gently, square the carcass, and fix tall units to the wall.
- Every step, start to finish
- Checked October 2026 — sources at the end
- Honest about when to call a pro
FIRST, THE HONEST ANSWER
Do it yourself, or get a handymen?
Do it yourself if…
- It is a bed, a chest of drawers, a bookcase, a desk or a wardrobe that arrives flat with drawings and fittings
- You have room to lay out every panel, and a second person for the tall or heavy pieces
- You can use a screwdriver and, for the wall restraint, a drill
- The instructions are complete and every bag of fittings is accounted for
Get a pro if…
- It is a fitted kitchen, a built-in wardrobe with sliding doors cut to the room, or a unit that has to be scribed to an uneven wall
- A wall-hung unit has to carry heavy loads on plasterboard with no studs where you need them
- It is a very tall or very heavy wardrobe you cannot lift upright safely with the help you have
- Parts are missing or damaged and the seller cannot replace them
Safety first
- Fix every chest of drawers, wardrobe and bookcase to the wall with the restraint supplied and a fixing that suits the wall. Tip-over is the serious risk with flat-pack.
- Lift tall and heavy units with a helper. The HSA’s manual handling advice is to plan the lift, keep the load close and avoid twisting.
- Check the wall for cables and pipes before you drill for the restraint.
- Keep small fittings, cam locks and plastic bags away from young children while you build.
- Never put a TV or heavy items on top of furniture not made for it, and put heavy items in the lowest drawers.
| MATERIAL | COVERAGE | FOR THIS JOB |
|---|---|---|
| Wall plugs and screws for the restraint | Chosen for your wall type, from the plug maker’s table | One set per restraint point |
| Wood glue | PVA, for dowels on pieces that will not be taken apart | A dab per dowel hole, optional |
| Spare cam locks and screws | From the seller by part number | Only if any are missing or damaged |
Is the carcass square?
Before you fix the back panel, measure the carcass corner to corner both ways. The two diagonals should match. If one reads 1,512 mm and the other 1,498 mm, the unit is racked by about 7 mm each way: push the long corner gently towards the short one until both diagonals read about 1,505 mm, then fix the back panel without letting it move.
A few millimetres out is enough to make doors hang crooked and drawers bind, so check every time.
Leaf through every page before you touch a panel. Look for the drawings with a warning symbol or two people, the steps where one wrong-way-round panel cannot be undone, and the tip-over restraint at the end. Knowing where the job is going tells you which edges face out, which holes face in, and where to stop and check.
A drill driver is quick, but in chipboard it strips threads and blows out the edge of a panel in a second. Use a hand screwdriver for cam locks and small screws, and if you use a driver for longer screws, set the clutch low and the speed slow. Hand-tight is correct for almost everything in the box.
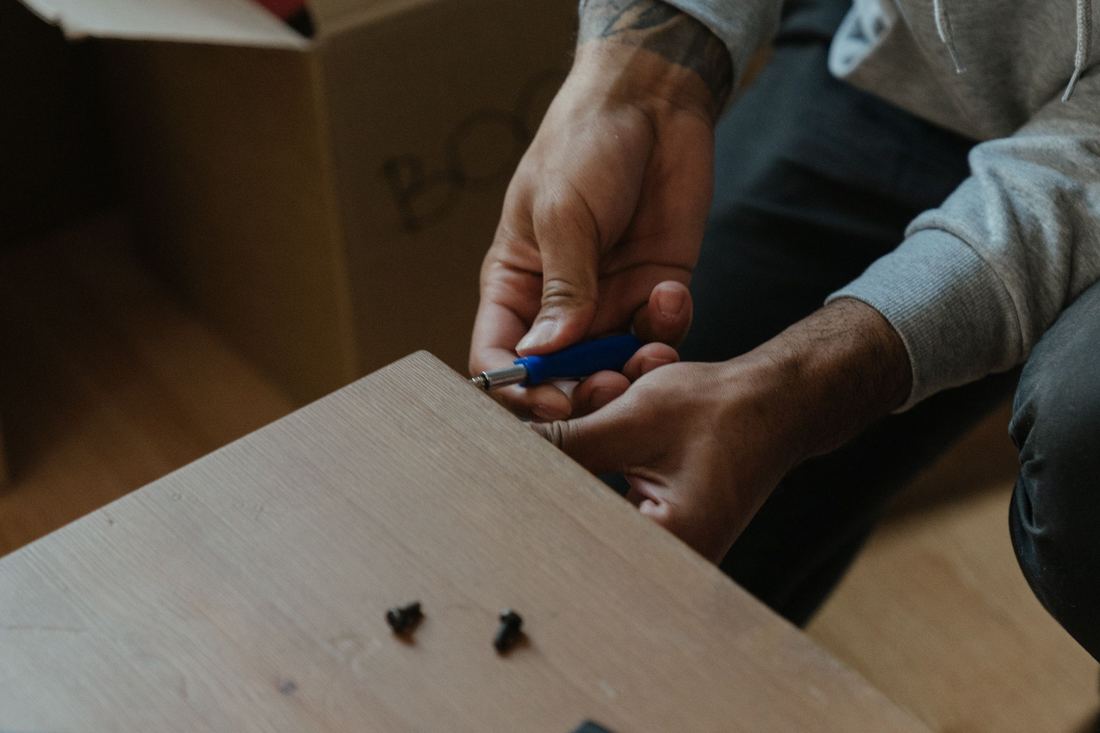
Wooden dowels line the panels up; cam locks pull them together; screws hold backs, hinges and runners. A cam lock only grips when its bolt is fully seated and the cam is turned to the stop — about half a turn. A cam that turns freely, or a gap you can see at the joint, means it has not caught.
The thin hardboard back is not just a cover. Nailed or slotted on with the carcass square, it stops the unit racking into a parallelogram. Fit it before the doors, and measure the diagonals before you fix it.
Chests of drawers, wardrobes and bookcases can tip forward when a child climbs the drawers or a heavy drawer is pulled out fully. One furniture maker’s safety campaign is blunt: the best way to prevent tip-over is to fix the furniture to the wall, with the restraint supplied and the right fixing for your wall type. Its wall guide gives examples: a 5 mm wood screw straight into a timber stud, or an 8 mm plug and screw in plasterboard without a stud or in masonry.
THE PART THAT DECIDES THE FINISH
Before you start — the kit and the space
The preparation is the same for most flat-pack, with a few differences by type. Pick the card that matches what you are building.
Every piece: the space and the parts
The first half-hour, whatever you are building.
- Clear floor space a little bigger than the finished piece laid on its back
- Open the boxes carefully with a blunt blade, never deep into the cardboard where a panel face sits
- Lay out every panel and match it to the parts list by its letter or number
- Tip each bag of fittings into a bowl or a muffin tray and check the counts against the list
Chests of drawers and bedside units
Drawers, runners and a tall narrow carcass that can tip.
- Sort the drawer parts into separate piles, one per drawer, before you start
- Identify the runner pairs — left and right are usually different
- Check the drawer bottoms are the right way up; the smooth face goes up
- Plan the tip-over restraint fixing before the carcass is finished
Wardrobes and tall bookcases
Tall, heavy, and often built lying down and lifted upright.
- Measure the ceiling height against the unit’s height plus its diagonal — a tall unit tilted upright can hit the ceiling
- Build it close to where it will stand
- Have a helper for the lift upright and for hanging doors
- Check the floor is level where it will stand; adjustable feet or packers fix small falls
Beds and desks
Wide frames that must not rack or wobble.
- Check the room is big enough to turn the frame once it is built
- Lay out the side rails and slats in order
- Have bolts and barrel nuts sorted together
- Plan to retighten the main bolts after a week
THE JOB
How to assemble flat-pack furniture, in order
Unpack, sort and count
30 minOpen the boxes on the floor where you will build, using a blunt blade along the edges so you do not score a panel. Stand the panels against a wall in the order the parts list gives, or lay them out on the cardboard. Tip each fitting bag into its own bowl and count against the list. If anything is missing or damaged, stop and contact the seller now.
- Keep the screws in labelled bowls by type until the moment you use them
- Lay the panels finished face up to avoid scratches
- Flatten the cardboard and keep it under you while you work
Mistake to avoid: Tipping every bag into one pile. Ten minutes in, two nearly identical screws are mixed up, and the wrong one splits a panel.
Read the drawings and identify the faces
15 minRead each step before you do it. Look at the drawing for which edges are drilled, which face has the cam holes, and where the shelf holes and the back-panel groove are. Turn the real panel until it matches the drawing exactly before you fit anything. The back-panel groove and the unfinished edges almost always face the back or the inside.
- Pencil a tick on the booklet as each step is done
- Hold a panel up to the drawing physically, not in your head
- Watch for the drawings showing a magnified detail; they hide the tricky orientation
Mistake to avoid: Fitting a panel upside down because the holes look symmetrical. You find out three steps later when the next piece will not line up.
Fit dowels and cam bolts
20 minPush the wooden dowels into their holes, tapping them home with the rubber mallet; a dab of wood glue makes the joint permanent on furniture that will never be taken apart. Screw the cam bolts into their holes by hand or with a screwdriver until they are fully seated, without forcing. Seat the cam locks in their round holes with the arrow pointing at the bolt hole.
- A dowel should stand proud by the same amount as the others — check with your fingers
- Do not overtighten cam bolts; chipboard threads strip easily
- Keep glue away from cam locks and bolts
Mistake to avoid: Driving cam bolts with a drill on full power. The thread in the chipboard strips and the joint never pulls tight.
Join the carcass panels
45 minBring the panels together on their dowels and bolts as the drawings show, with a helper holding the tall ones. Turn each cam lock clockwise until it stops — usually about half a turn — and check the joint has pulled up tight with no gap. Fit the fixed shelves and the top and bottom as you go.
- Build on its back for wardrobes and tall bookcases
- A cam that keeps turning has not caught the bolt — back it off and check the bolt is fully in
- Check each joint by pressing the panels; nothing should move
Mistake to avoid: Leaving a cam half-turned because it feels tight. The joint holds for a week and then opens.
Square the carcass and fit the back
20 minWith the carcass on its face or back, measure the diagonals corner to corner and push it gently until they match. Slide the back panel into its groove, or lay it on and nail or clip it round the edges as the drawings show, working from one corner and keeping the carcass square as you go.
- Nail from the middle of each edge outwards to stop the back panel bowing
- Check the diagonals again halfway through fixing
- On tall units, fit any centre support or joining strip the drawings show
Mistake to avoid: Fixing the back panel without checking square. The doors hang crooked for the life of the unit.
Build and fit the drawers
1 hrBuild one drawer at a time from its own pile. Check the bottom goes in the groove smooth face up and the front is the right way round. Fit the runners to the carcass and to the drawers, left and right as marked, then slide each drawer in and check it runs smoothly and closes level with the others.
- Fit runners with the screws in the slotted holes first, so you can adjust before tightening
- A drawer that catches usually has a runner one hole out
- Keep heavy items for the bottom drawers
Mistake to avoid: Mixing up left and right runners. The drawer jams halfway and the runner bends.
Hang and adjust doors
45 minFit the hinges to the doors, then hang each door on the carcass with a helper holding it. Use the three adjustment screws on each concealed hinge to set the gaps: one moves the door in and out, one sideways, one up and down. Adjust in small turns until the gaps are even and the doors meet in a straight line.
- Adjust the top hinge and the bottom hinge together, a quarter turn at a time
- Close the door after each adjustment to see the effect
- Fit any soft-close dampers after the doors are set
Mistake to avoid: Hanging doors before the unit is standing in its final place on a level floor. The gaps change when you move it.
Stand it, level it and fix it to the wall
30 minWith a helper, lift the unit upright and move it into position. Level it with the feet or with packers under the base. Check the wall behind for cables and pipes with the detector, then fit the tip-over restraint supplied with the unit, using a fixing that suits your wall: a screw into a timber stud, a suitable plug in plasterboard or masonry. Tighten it so the unit is held firmly against the wall.
- Never leave a chest of drawers or a wardrobe unfixed, even for a night
- Put heavy items in the lowest drawers and never a TV on top of a chest not made for one
- If your wall needs a different fixing from the one in the box, buy the right one
Mistake to avoid: Leaving the restraint for later. Tip-over accidents happen in the first days, when nobody expects the unit to move.
The mistakes that make it worse
- Using a drill on full power for cam bolts and small screws
- Not checking the diagonals before fixing the back panel
- Mixing the fitting bags into one pile
- Leaving a tall unit standing without the tip-over restraint
- Lifting a heavy wardrobe upright alone
Stop here and get a flat-pack assembler
- Parts are missing, damaged or the drawings do not match the panels
- It is a fitted unit that has to be cut or scribed to the room
- A wall-hung unit must carry heavy loads on a wall you cannot fix into safely
- You cannot lift the finished piece upright safely with the help you have
| WHAT YOU SEE | WHY, AND THE FIX |
|---|---|
| Cam lock will not tighten | The bolt is not fully screwed in, or the cam is turned the wrong way. Back it off, seat the bolt, point the cam arrow at the bolt and turn it clockwise to the stop. |
| Doors hang crooked or do not meet | The carcass is out of square or the hinges need adjusting. Check the diagonals and the level, then adjust each hinge a quarter turn at a time. |
| Drawer sticks or will not close level | A runner is fitted one hole out or upside down. Check left and right, and adjust using the slotted holes before tightening. |
| Screw spins and will not tighten | The chipboard thread is stripped. Glue a wooden dowel or matchsticks into the hole, let it dry, and refit the screw by hand. |
| Unit wobbles | The floor is not level or the back panel was fixed out of square. Level the feet or pack the base, and refix the back if needed. |
| A panel fitted the wrong way round | Undo back to that step and turn it. Do not drill new holes — match the drawing instead. |
| Wall restraint will not hold | The fixing does not suit the wall. Find a stud, or use a plug made for your wall type. |
WHAT YOU SAVE
What it costs to do it yourself
| Screwdriver set | €15–€27 |
|---|---|
| Wall plugs for the restraint, pack | €4–€4.65 |
| Wood glue | €6.20–€7 |
| Total, tools and fixings for most flat-pack | €5–€25 |
| DIY total | €5–€25 |
Guide prices compiled by the Locufy team from published Irish and UK provider price lists and 2026/27 cost guides. Updated 2026.
The fittings come in the box. A good screwdriver set and the right wall plugs are the only things most people need to buy, and they last for the next piece too.
RATHER NOT?
Flat-pack assemblers near you, with prices shown
The ones who cover your area, nearest first, with one score from every review. No account needed to look.
Or post the job free and let them come to you.
Chipboard settles. Check the cam locks, bed bolts and hinge screws after a week of use and nip them up by hand.
Tape the booklet and the spare fittings inside a drawer or the back of the unit; you will want them when you move.
Flattened clean cardboard goes in the recycling bin. Old furniture can often be recycled at your civic amenity site, and some local authorities run a bulky goods collection for a fee — mywaste.ie lists the options. A piece still in good order can go to a charity shop or a reuse project.
Look at the strap or bracket behind tall units once in a while, especially after moving the furniture or redecorating.
Assembling flat-pack furniture: questions people ask
Yes. Tip-over is the main danger with flat-pack furniture, especially with children in the house. Use the restraint supplied and a fixing that suits your wall — a screw into a stud, or the right plug in plasterboard or masonry.
For long screws, on a low clutch and slow speed. For cam bolts and small screws, use a hand screwdriver; a drill strips chipboard threads quickly.
Stop before you build round it. Note the part number from the booklet and contact the seller, who will usually send a replacement.
Glue a wooden dowel or a few matchsticks into the hole, let it dry, trim it flush and drive the screw in again by hand.
The carcass is out of square or not level. Check the diagonals and the floor, then adjust the hinges a quarter turn at a time.
On the Locufy price guide for Ireland, assembly costs €40–€130 per item, typically €70. A small chest is at the low end; a large wardrobe with sliding doors is at the top.
MORE GUIDES
More DIY guides
Sources — checked October 2026
- IKEA Ireland — Secure it! Tip-over prevention and wall anchoring guide: 5 mm wood screw into a stud, 8 mm plug and screw
- fischer — DuoPower universal plug: drill sizes and maximum loads by wall type
- HSA — manual handling
- HSA — electricity
- MyWaste — what to do with wardrobes and furniture
- diy.ie — screwdriver sets, price check October 2026
- diy.ie — wall plugs, price check October 2026
- diy.ie — wood glue, price check October 2026