DIY GUIDE · GARDEN & OUTDOOR · CHECKED OCTOBER 2026
How to set up garden watering yourself
An afternoon to lay. £172–£217 for a timer, a drip kit, a soaker hose and fittings.
A hose timer on an existing outside tap, a drip or soaker line laid on the surface, set and checked. Mains plumbing stops here.
- Every step, start to finish
- Checked October 2026 — sources at the end
- Honest about when to call a pro
FIRST, THE HONEST ANSWER
Do it yourself, or get a gardener?
Do it yourself if…
- You already have an outside tap fitted with backflow protection, such as a double check valve
- The whole system plugs onto that tap and lies on or just under the surface
- It runs from a battery timer, with no new pipework, pumps or wiring
- You have checked with your water supplier whether they need to be told about an automatic watering system
Get a pro if…
- There is no outside tap, or the existing one has no backflow protection
- You want a buried system with pipes run from the mains supply, or pop-up sprinklers in the lawn
- You want a pump drawing from a large tank, or a mains-powered controller
- The garden is large enough that the system needs zoning and pressure design
Safety first
- Never connect a hose or watering kit to a tap that has no backflow protection. The Water Supply (Water Fittings) Regulations 1999 require every water system to have adequate devices to stop water flowing back into the supply, and a hose left in a pond, a butt or a bucket of feed is exactly that risk.
- Do not leave a hose or drip line full of water sitting in the sun for days and then spray it at people; flush stagnant water out to the ground before using a sprinkler.
- Keep mains-powered controllers, pumps and any electrics to an RCD-protected socket; HSE advises an RCD of 30 mA or less outdoors. A battery timer avoids the issue altogether.
- Lay lines where nobody will trip on them, and peg them flat across paths or bring them under a board.
- Keep weedkiller and feed sprayers separate from the watering system so nothing is drawn back into the hose.
- Drain the timer, hoses and lines before frost; water left inside freezes, expands and splits them.
Stop here: Anything plumbed into the mains supply
In England and Wales, the 1999 Water Supply (Water Fittings) Regulations say that every water system must have adequate devices to prevent backflow into the supply, and the water supplier must be notified before a garden watering system not designed to be operated by hand is installed, or before pipes are laid outside a building at less than 750 mm or more than 1350 mm below ground. Northern Ireland has the same requirements in its own water fittings regulations, made in 2009, and Scotland in the Scottish water byelaws. New outside taps, buried supply pipes and connections to the mains are plumbing work for an installer who knows those rules. How to hire an irrigation installer →
| MATERIAL | COVERAGE | FOR THIS JOB |
|---|---|---|
| Micro supply pipe and drippers | Low-pressure system | Enough to reach each pot or plant group |
| Soaker hose | Porous rubber or fabric | The length of the border or row |
| Mulch | A layer of bark or compost over soaker hoses | A layer to cover the hose |
| Spare drippers and end plugs | For changes and repairs | A small pack |
How long to run each zone
Run time = water needed ÷ delivery rate. Measure a dripper's rate by catching its water in a cup for 10 minutes. If a pot needs about 1 litre a day and its dripper gives 2 litres an hour, run it for 30 minutes; a soaker hose giving 10 litres per metre an hour along a border that wants 5 litres per metre twice a week runs 30 minutes, twice a week.
Delivery rates vary with pressure, length of run and the kit; always measure your own. Then check the soil or compost after the first few cycles and adjust.
A timer screws onto the outside tap and opens and closes on a schedule, running on batteries so there is no wiring. Simple models offer set durations once or twice a day; one maker's sensor model chooses sunrise, sunset or both, with runs of 2 to 60 minutes. Check the timer's connection fits your tap; adaptors cover the common thread sizes.
A micro kit runs a thin supply pipe along the surface with drippers or micro sprayers at each plant or pot. It works at low pressure; the timer maker gives about 1.5 bar for micro systems, far below what a sprinkler wants, so a pressure reducer is usually part of the kit.
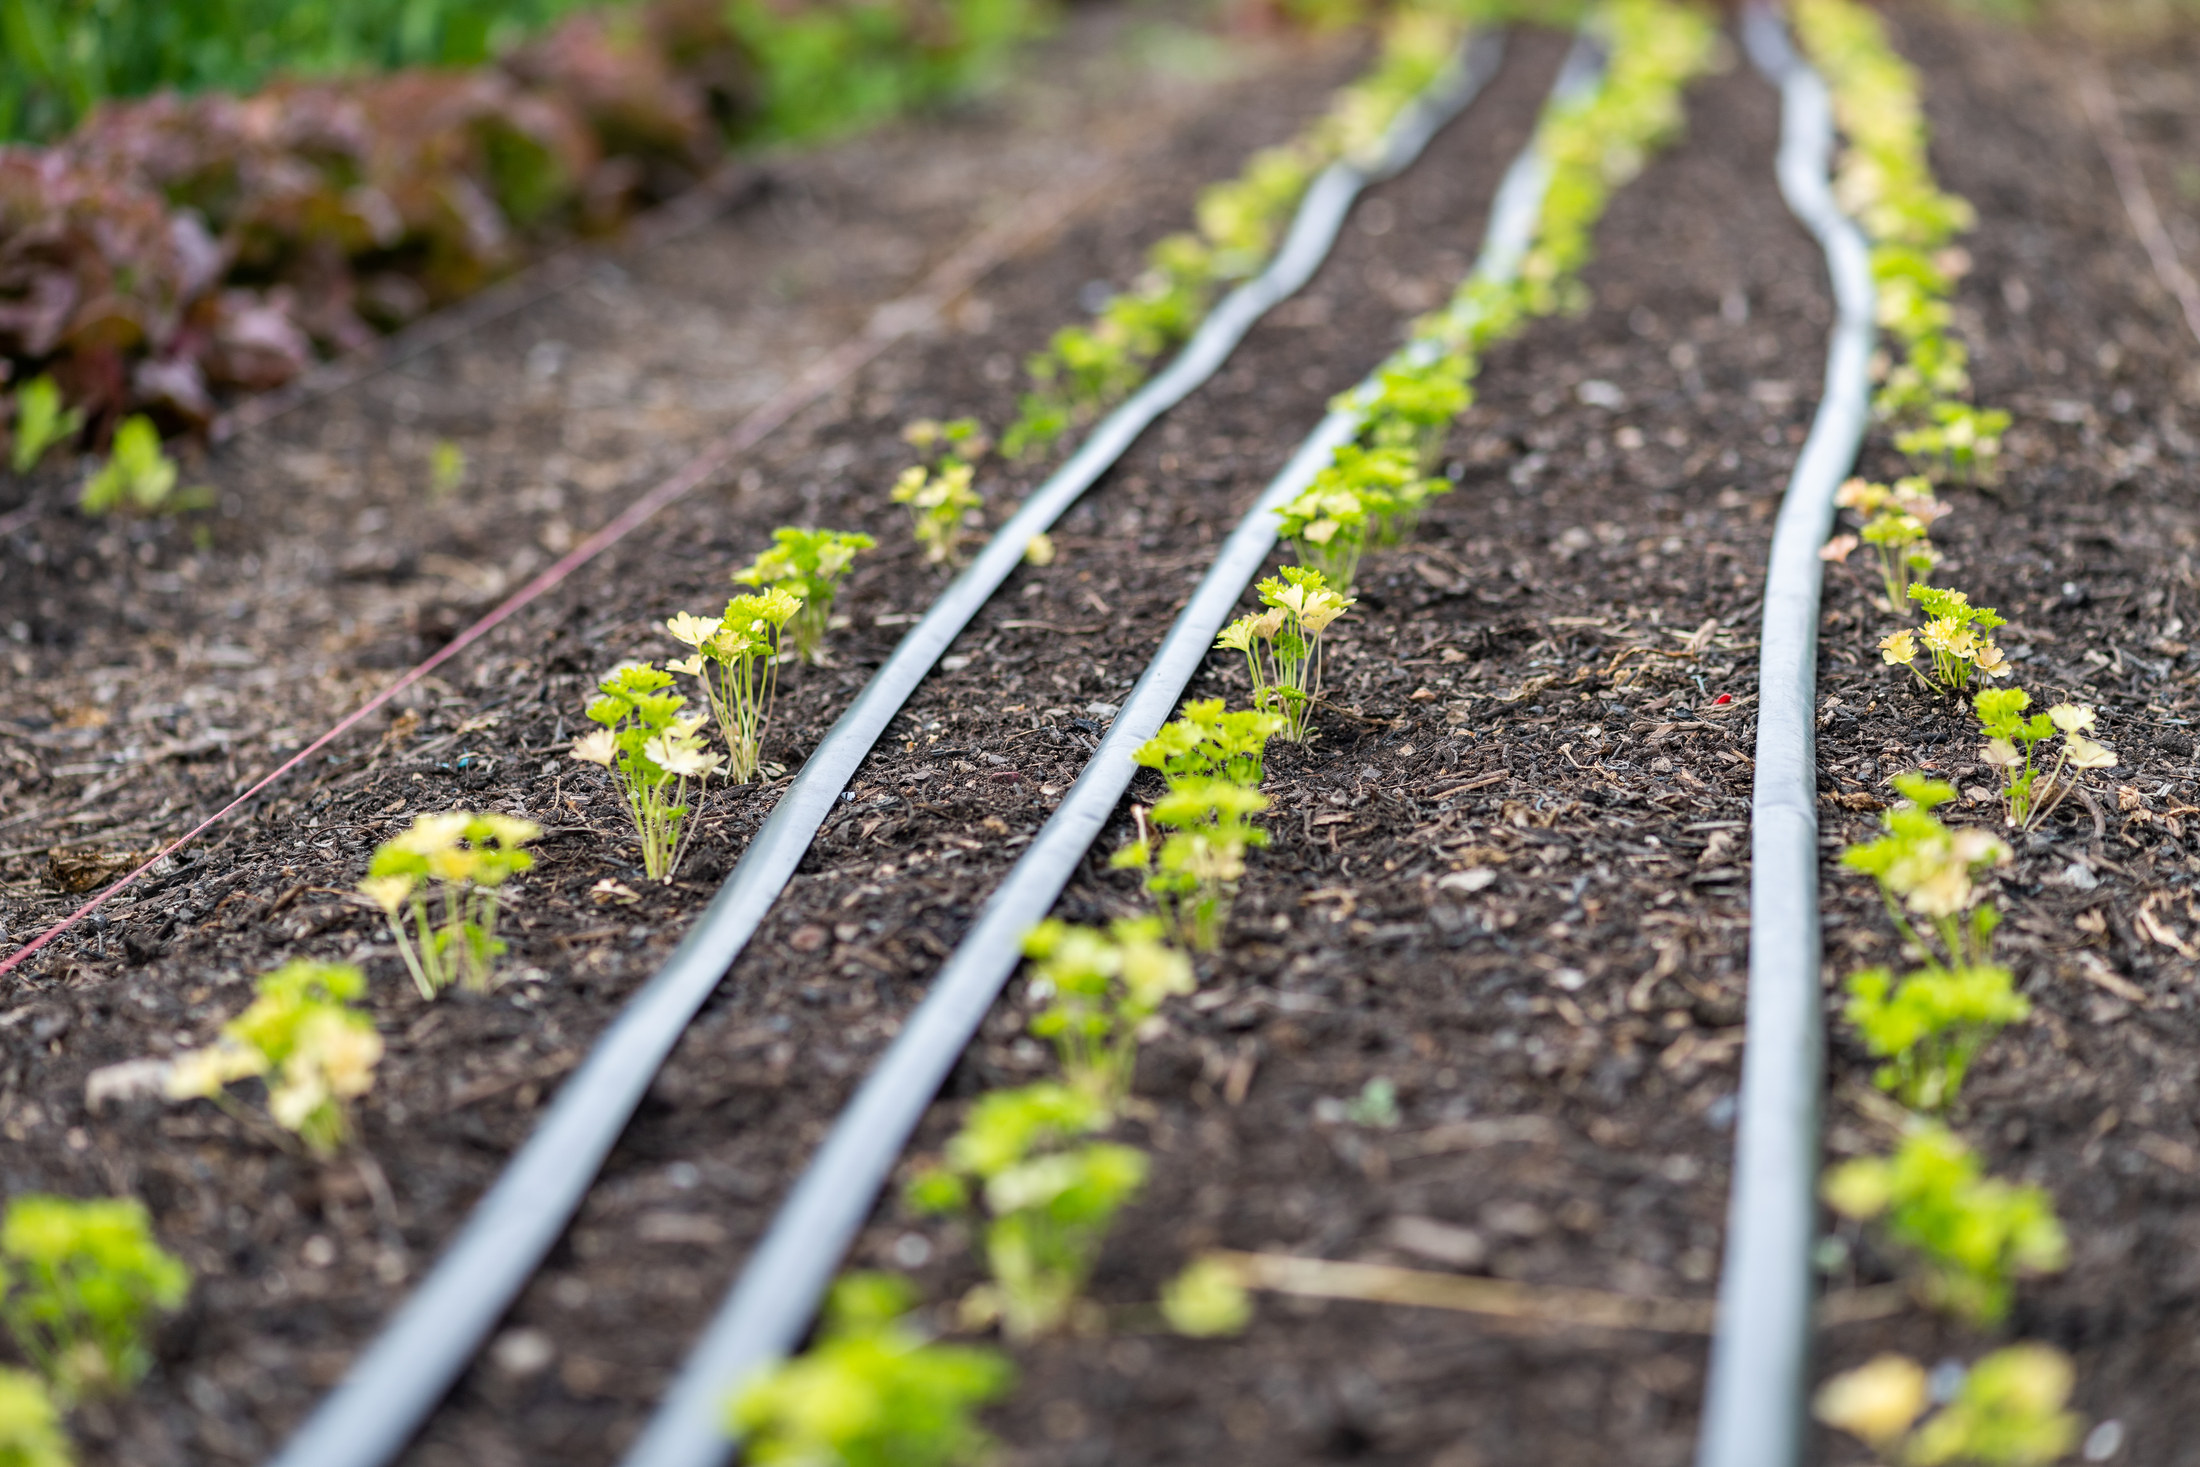
A porous soaker hose weeps water along its whole length and suits borders, hedges and vegetable rows. Lay it at the base of the plants and cover it with mulch to cut evaporation further.
Sprinklers cover lawns but lose a lot of water to wind and evaporation and wet leaves that would rather stay dry. If you use one on a timer, run it early in the morning and only in prolonged dry spells.
Some timers work from a water butt at very low pressure — one maker gives 0.1 bar — which suits a drip line or soaker hose on a gravity feed. A butt-fed system also keeps working when a hosepipe ban is in place, depending on your water supplier's rules.
Automatic garden watering connected to the mains is covered by the water fittings rules: backflow protection on the tap and, for a garden watering system not designed to be operated by hand, a duty in England and Wales to tell the water supplier before installing it. Ask your supplier whether your tap-timer set-up needs notifying.
THE PART THAT DECIDES THE FINISH
Before you lay it — by what you are watering
Pots, borders, vegetables and lawns want water delivered differently. Find each part of your garden below.
Pots, baskets and grow bags
Small volumes that dry out fastest.
- Group pots together so one supply line can reach them all
- Fit one dripper per pot, two for large containers, and stake each into the compost
- Raise pots on feet so the drippers do not waterlog them
- Start with short runs and check how wet the compost is after the first cycle
Borders and hedges
Long runs of established planting.
- Lay a soaker hose along the base of the plants, snaking between them
- Cover it with mulch to hold the water in the soil
- Keep runs within the length the hose maker recommends for even flow
- Run it for longer, less often, to water deeply
Vegetable beds and raised beds
Rows and crops that need steady moisture.
- Lay a soaker hose or dripline along each row
- Keep water off the leaves of tomatoes and potatoes to reduce disease
- Plan the line so it lifts out easily when you dig or rotate crops
- Water in the morning so the soil dries a little by evening
A lawn
The biggest area and the thirstiest.
- Most established lawns survive drought and green up after rain; watering them is optional
- If you do water, use a sprinkler early in the morning, deeply and infrequently
- Buried pop-up systems connected to the mains are a plumbing job
- New turf or seed is the exception and needs regular watering until established
A garden with no outside tap
Or one without backflow protection.
- Do not run a hose from a kitchen tap through a window as a permanent arrangement
- Use a water butt with a low-pressure timer instead, if your timer supports it
- A new outside tap is plumbing work that must include backflow protection
- See the Stop here card
THE JOB
How to set up timed watering, in order
Check the tap and the rules
15 minLook at your outside tap for backflow protection, usually a double check valve built into the tap or fitted just before it. If there is none, stop and have one fitted. Contact your water supplier to ask whether they need to be notified about an automatic garden watering system, as the water fittings rules require in some cases.
- Look for a small valve or a marking on the tap body
- Keep a note of what the supplier tells you
- Check for any hosepipe restrictions in force
Mistake to avoid: Screwing a timer onto any tap that is handy. Without backflow protection, a hose dropped in a butt or pond can draw dirty water back into the supply.
Plan the zones and the routes
30 minWalk the garden and group what needs watering into zones with similar needs: pots in one, a border in another, vegetables in a third. Plan the route of each line from the tap, keeping it out of paths and lawns where you will mow. Measure the lengths.
- One timer outlet per zone, or a multi-outlet timer
- Keep runs short; long runs lose pressure at the far end
- Sketch it with the lengths written on
Mistake to avoid: One long line round the whole garden. Plants near the tap drown and those at the end go dry.
Fit the timer and connectors
15 minScrew the timer onto the tap with the adaptor that fits, hand-tight, and fit the tap connector below it. Fit fresh batteries and set the clock. If you want to keep a hand hose, fit a two-way valve so one outlet goes to the timer and one to the hose.
- Hand-tight only; overtightening cracks plastic threads
- Point the timer's display away from the sun if you can
- Test the manual run button with the tap open
Mistake to avoid: Forgetting the tap must stay open. The timer controls the flow; with the tap off, nothing happens and the plants go dry.
Lay the drip line for pots
45 minRun the micro supply pipe along the base of the pots, fit the pressure reducer at the start as the kit shows, and push in a dripper or a micro spray at each pot, held in place with a stake. Cut pipe square with a sharp knife and push connectors fully home. Fit an end plug at the far end.
- Warm stiff pipe in a bucket of hot water so it lies flat
- Keep drippers just above the compost, not buried
- Leave a little slack at each pot so you can move it
Mistake to avoid: Skipping the pressure reducer. Micro fittings pop off and spray when they get full tap pressure.
Lay the soaker hose
30 minLay the soaker hose along the border or row, close to the plant stems, snaking round larger plants. Peg it down and cover it with a layer of mulch. Connect it to its timer outlet and fit an end cap.
- Lay it in the sun for an hour first so it uncoils easily
- Keep it close to the roots; water a foot away is wasted
- Do not bury it in soil; mulch is enough
Mistake to avoid: Laying the soaker hose on top of bare soil in full sun. Much of the water evaporates before it gets to the roots.
Flush and test each zone
20 minBefore fitting end plugs, run water through each line for a minute to flush out grit, then plug the ends. Run each zone manually and walk the line, checking every dripper drips and every joint is dry. Catch a dripper's output in a cup for a few minutes to learn its real rate.
- Fix leaks now while you can see them
- Note each zone's delivery rate for the run-time calculation
- Check the far end of each line works as well as the near end
Mistake to avoid: Fitting the end plugs first. Grit from the pipe lodges in the drippers and blocks them.
Set the schedule
15 minWork out run times from the delivery rates and what each zone needs, using the calculator above, and programme the timer. Water early in the morning or in the evening, when less is lost to evaporation and leaves are not scorched. Start conservatively.
- Pots in summer may need watering daily; borders twice a week
- Longer, less frequent runs water deeper than short daily ones
- Turn the schedule off after heavy rain
Mistake to avoid: Setting a long daily run for everything. Borders become waterlogged, roots stay shallow and the water bill climbs.
Check and adjust over the first fortnight
10 minFor the first two weeks, push a finger into the compost and soil a few hours after a cycle. Dry means run longer; soggy means shorter or less often. Adjust as the weather changes and as plants grow.
- Check pots on the hottest days
- Clear any dripper that has stopped with a pin
- Change batteries at the start of each season
Mistake to avoid: Setting it once and forgetting it. Weather changes, a dripper blocks, and you find a dead pot a week later.
Drain and store before frost
30 minBefore the first frosts, disconnect the timer from the tap, drain it as its maker describes, remove the batteries if it will be stored for a long time, and store it indoors. Open the ends of the lines and drain them, or lift and store them. Frost splits anything left full of water.
- Store the timer somewhere dry and frost-free
- Coil hoses loosely without sharp kinks
- Label each line's zone before lifting it
Mistake to avoid: Leaving the timer on the tap all winter. Water inside freezes and cracks the valve.
The mistakes that waste water or break the kit
- Connecting to a tap with no backflow protection
- Missing the pressure reducer on a micro system
- Long daily runs instead of fewer, deeper waterings
- Leaving the timer and lines full over winter
Stop here and get an irrigation installer
- There is no outside tap, or the tap needs backflow protection fitting
- You want pipes run from the mains, buried supply lines, or pop-up sprinklers in the lawn
- The system needs a pump from a tank, a mains-powered controller or any new wiring
- The garden is large enough to need zoning, pressure and flow design
| WHAT YOU SEE | WHY, AND THE FIX |
|---|---|
| Some drippers not dripping | Grit or limescale in the dripper, or a run too long for the pressure. Clear it with a pin or soak it in vinegar, flush the line, and shorten runs. |
| Fittings popping off the micro pipe | Too much pressure, or connectors not pushed home. Fit the kit's pressure reducer and push connectors fully on. |
| Timer not switching on | Flat batteries, the tap turned off, or the clock reset. Fit fresh batteries, open the tap, and reset the schedule. |
| Pots waterlogged | Run too long or too often, or no drainage. Shorten the run, raise pots on feet, and check drainage holes. |
| Border still dry after watering | The soaker hose is too far from the roots, or the run is too short. Move it closer to the stems, mulch over it, and run it longer and less often. |
| Water pooling at the tap | A loose connector or a failed washer. Tighten by hand and replace the washer. |
| Timer cracked after winter | Frost damage from water left inside. Replace it, and drain and store it indoors next winter. |
| Uneven watering along a line | Run too long, or the line rising and falling with the ground. Split it into shorter zones and keep the line as level as you can. |
WHAT YOU SAVE
What it costs to do it yourself
| Battery hose timer | £59–£65 |
|---|---|
| Micro or drip irrigation kit | £64–£98 |
| Soaker hose, 25 m | £47 |
| Tap connector | £2–£6.75 |
| Total, first time | £172–£217 |
| DIY total | £172–£217 |
Guide prices compiled by the Locufy team from published Irish and UK provider price lists and 2026/27 cost guides. Updated 2026.
This assumes an outside tap with backflow protection is already there. A water butt kit adds a little more and gives a supply that does not touch the mains. An installer's price for a plumbed system is a different scale altogether.
RATHER NOT?
Irrigation installers near you, with prices shown
The ones who cover your area, nearest first, with one score from every review. No account needed to look.
Or post the job free and let them come to you.
Shorten runs in cool or wet spells and lengthen them in heat; turn the timer off after heavy rain and over autumn.
Disconnect, drain and store the timer indoors before frost; drain or lift the lines, as the maker advises.
Take worn-out hoses and fittings to the household waste recycling centre or use your council's recycling collection, and put spent batteries in a battery recycling point, not the bin.
Flush the lines at the start of each season and clean or replace blocked drippers.
Setting up timed garden watering: questions people ask
Yes, if the tap has backflow protection, such as a double check valve. A battery timer screws on with no plumbing or wiring. Ask your water supplier whether an automatic garden watering system needs to be notified.
Under the water fittings rules in England and Wales, the water supplier must be told before a garden watering system that is not designed to be operated by hand is installed. Northern Ireland has a matching rule, and Scotland its own byelaws. Your supplier can say whether a tap-timer set-up counts.
Backflow is water flowing the wrong way, back into the supply pipe, which could carry dirty water from a pond, butt or bucket into the mains. The regulations require devices to prevent it, usually a double check valve on an outside tap.
For pots, beds and borders, yes: it puts water at the roots with far less loss to evaporation and wind, and keeps leaves dry. Sprinklers are for lawns, used sparingly and early in the day.
It depends on your water supplier's rules. Systems fed from a water butt are often allowed; check the supplier's terms before using any mains-fed system during a ban.
The Locufy UK price guide puts garden irrigation installation at £500–£4,000 per job, typically £1,200. Buried, zoned systems connected to the mains sit at the top of that range.
MORE GUIDES
More DIY guides
Sources — checked October 2026
- Hozelock — Sensor Controller: durations, pressures, tap adaptors, water butt use
- Hozelock — maintaining garden watering products through winter
- Hozelock — watering borders and plant beds
- Water Supply (Water Fittings) Regulations 1999, Schedule 2 — backflow prevention (England and Wales)
- Water Supply (Water Fittings) Regulations 1999, regulation 5 — notifying the water undertaker
- Water Supply (Water Fittings) Regulations (Northern Ireland) 2009, regulation 5
- HSE — electrical safety FAQs: RCDs outdoors
- GOV.UK — recycling collections and your council
- Wickes — price check: hose timers
- Wickes — price check: drip and micro irrigation kits
- Wickes — price check: soaker hose
- Wickes — price check: hose connectors